iTunes is initially created to manage digital music collections and sync them to iOS devices. But later, it comes with more features, which can connect to the iTunes Store (if the network connection exists) to download purchased digital music, music videos, TV shows, iPod games, various podcasts, and standard feature movies. What if you have a big collection of old home videos, movies, and TV series on DVDs and want to put the DVD movies on iTunes for syncing with your iOS devices?
"Hello, I really want to put DVDs that I have onto my iTunes but I don't know how. Is there anything that I have to download for it? I was wondering what is the easiest way to copy my personal DVDs to my iTunes library so I can watch them on my iPod touch." - Question from discussions.apple.com
Of course, most of us are not to pay iTunes' ridiculous prices to watch movies and TV shows we already own on DVD. We just need to rip DVD to iTunes friendly formats and then add them to iTunes library for syncing with iPad, iPhone, iPod or Apple TV. In this article, we will introduce the top 3 methods on how to copy DVDs to iTunes library.
Way 1: Rip DVDs and Transfer DVD Movies to iTunes
There is a long list of free and paid options out there that allow us digitize DVD collections. But if you do not want to be held back by slow processing, poor output quality and to look for the best option to extract iTunes compatible videos from DVDs, EaseFab DVD Ripper will be your best choice. The program is very easy to use and can easily rip any protected DVDs, old and new titles, homemade/burned discs, other DVDs. With 350+ built-in formats and devices, you can convert DVDs to Mac/iOS/iTunes specific video audio formats for free, like MP4, MOV, M4V, HEVC, MP3, etc for playing on PC, iPhone, iPad and Apple TV.
The process of ripping DVD to iTunes is straightforward. Pop in your disc, choose an iTunes output profile (H.264, MP4 or iPad, iPhone preset), and click the Convert button to start the ripping. Now just download the program and follow the step-by-step guide to learn how to easily and quickly transfer DVD movies to iTunes library.
3 Simple Steps to Put DVDs on iTunes Library with EaseFab DVD Ripper
Step 1. Load DVD Files
Insert a DVD into your DVD drive, and click the load dvd button. The program will add the DVD to the program and list all the titles. Double-click one of the titles, and you can preview the movie in the Preview window on the right. See the picture below. You can also import ISO files, IFO files or DVD folder for conversion.

Step 2. Select iTunes/iOS supported format
Click Profile and move mouse cursor to Apple catelog and then select the desired device model on which you want to play the DVD files. Of course, you can also choose an iTunes compatible format like MP4, M4V, MOV from the Common Video catelog.
Step 3. Initiate the conversion process - DVD to iTunes.
After selecting your desired format and the destination file you can opt to make changes or settings and if you are OK with the way the format is click the Convert button to initiate the conversion. This might take some time; however, it is important to note that the conversion time depends on the size of the DVD movies.
When the conversion completes, open your iTunes and transfer the ripped DVD movies to your iTunes library and then sync them to your iPhone, iPad, Apple TV, etc.
Way 2: Digitize and Copy DVDs to iTunes with Handbrake
HandBrake is a cross platform program, available to Mac (Mac OS X 10.7 to 10.15), Windows (Windows 7 to 10) and Ubuntu. As an open-source DVD ripper, it won't cost you a penny. Basically, it can convert unportected DVD to MP4 or M4V videos for adding to iTunes or playing on iPod, PSP, Apple TV, TV, mobile phone, etc.
HandBrake can't rip commercially copy-protected DVDs. If you want to use HandBrake to rip encrypted DVDs, you should firstly download libdvdcss - a part of VideoLAN project capable of reading and decrypting DVDs locked by region codes 1-6 and CSS.
Simply go to HandBrake.fr - the only official place to download HandBrake - to get a copy fit for your computer and install it following wizard. The latest version is 1.3.3.
How to Rip CSS-Protected DVD to iTunes with HandBrake: Steps
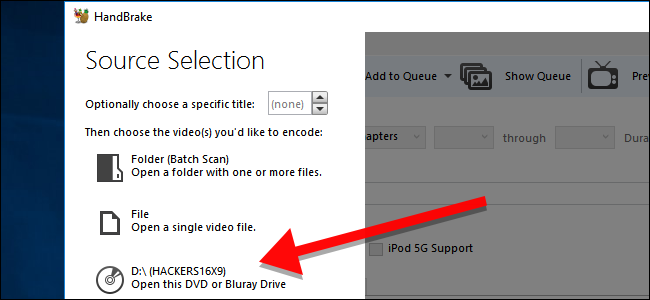
Step 1. Open Your DVD in Handbrake
Insert the DVD into the DVD drive on your computer. Open Handbrake and choose your DVD drive from the sidebar that appears.
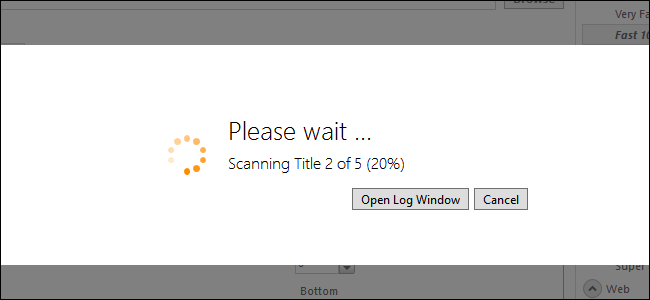
Handbrake will take a moment to scan the titles on your DVD. Wait until this process is finished. It should only take a moment. If libdvdcss wasn't installed incorrectly, you'll see an error saying that the disc can't be read here instead.
Once your DVD is open, head to the "Title" dropdown box and choose which title you want to rip. By default, Handbrake will choose the movie, but if you want to rip any special features or deleted scenes, you can change the target you want to rip here. You can also change which chapters you want to rip, if you only want part of the movie.
Under Destination, click Browse to pick where you want to place the movie after you've ripped it.

Step 2. Choose Your Quality Preset
Next, you'll need to decide the quality of your output file. The higher quality the movie, the more space it will take on your hard drive. If you're technical, you can use the Picture, Video, and Audio tabs to adjust these settings, but most people only need to click one thing: a Preset.
Along the right side of the Handbrake window, you'll see a selection of Presets (if you don't see it, drag the corner of Handbrake's window and expand it until you do). There are presets for nearly anything you could need: Apple TV, Android phones, PlayStation, and lots more. If you're watching on your computer, use one of the "General" presets - "Fast" and "Very Fast" will be low quality but small in size, while "HQ" and "Super HQ" will have higher quality but take up more space.
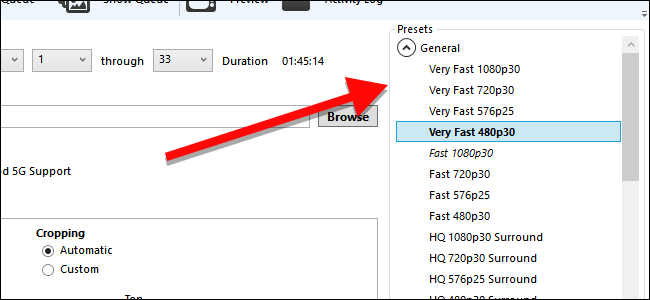
If you're ripping a DVD sold in the US, choose the 480p preset. European DVDs are usually 576p. Don't choose larger presets like 720p or 1080p for DVDs—they won't make your video look any better, they'll just make the file bigger.
Step 2. Start Ripping Protected DVD using Handbrake
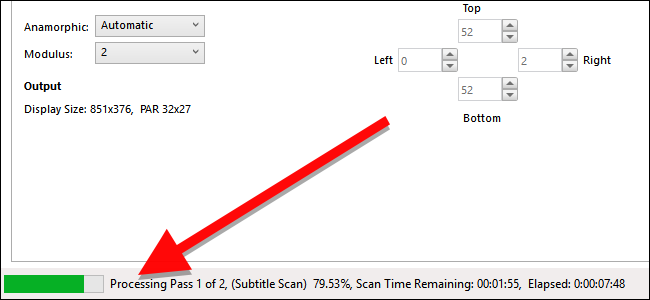
Once you've chosen your Title and Preset, click Start Encode at the top of the window. Then, grab a snack.
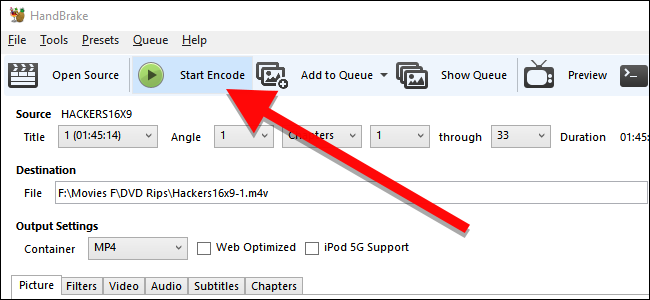
You'll see a progress bar along the bottom that will let you know how much time you have left in the rip. Higher quality rips will take longer, so you'll want to let your computer run for a while.
Handbrake or EaseFab DVD Ripper
HandBrake is free to download and use on Windows, Mac, and Linux. It can rip DVDs to MP4 and MKV within a few steps. However if you try to use HandBrake to rip read-only DVDs, you will probably end in failure. Only with the help of libdvdcss, HandBrake can rip some read-only discs. But the annoying thing is that libdvdcss doesn't always work.
But it's different with EaseFab DVD Ripper. As a Handbrake substitute for DVD ripping, EaseFab DVD Ripper surpasses Handbrake in many aspects, such as:
▶ It can rip DVDs protected by DVD CSS, region code, RCE, Sony ArccOS, UOPs, Disney X-project DRM and more independently. 99-title DVDs and workout DVDs are fully supported. It automatically ticks the right title and delivers high-quality output in order. No crashes. HandBrake only decrypts and rips some certain DVDs with CSS.
▶ It provides 320+ different output formats. The famous free tool Handbrake allows users to rip DVD to MP4 and MKV only, but this tool is able to convert DVD to AVI, MP4, WMV, MOV, FLV, MPEG, MP3, AAC, M4A and more video audio formats besides MKV and MP4.
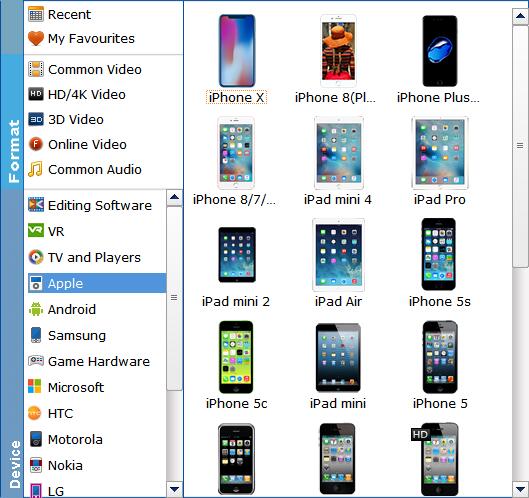
▶ It comes with 350+ preloaded profiles. Handbrake provides limited output profiles, while EaseFab DVD Ripper is designed to help directly rip DVD to iPhone 11/Pro/XS/XR/X/8/7/6S/6 Plus, iPad Pro/Air 2/mini 3/4, Apple TV, Android Samsung, HTC, Google Nexus, Sony, Windows devices, etc.
Conclusion: All things considered, EaseFab DVD Ripper should be the better option.
How to Add Ripped DVD Movie into iTunes Library
After finishing the DVD to iTunes conversion process, the next step is to add the movies from your computer to your iTunes library so that you can easily sync them with your iPad, iPhone or Apple TV for enjoyment. And here is how to do it.
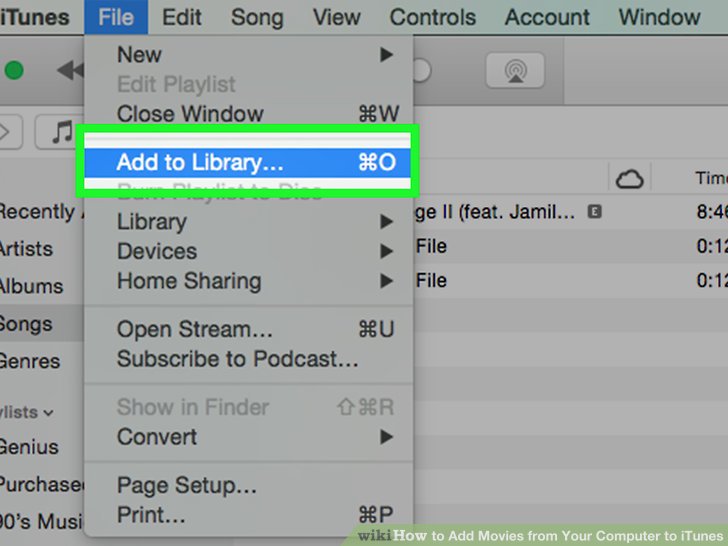
1. Open iTunes and Click on File > Add to Library
.
2. Browse for files. Locate the video file you want to put into your iTunes library. To select multiple files, hold down Control (Windows) or Command (Mac) as you click.
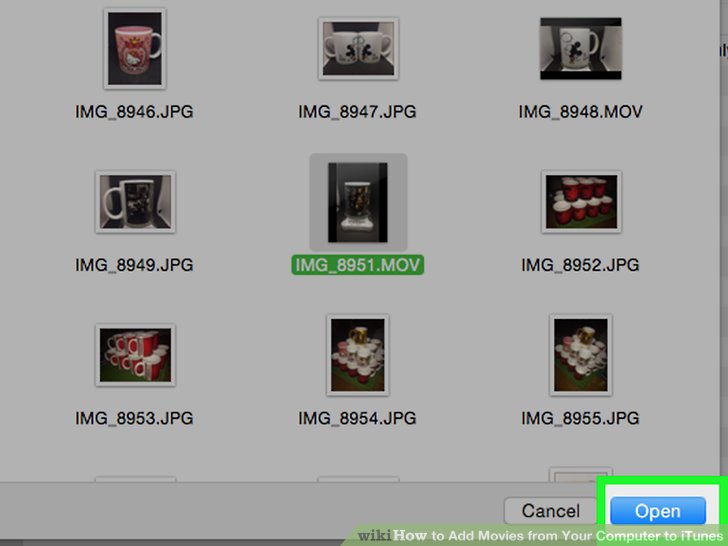
3. Click Open. Once you have selected all of your files, click OK or Open to add them to your library.
✔ Drag and drop the file (alternate method).
You can also drag and drop all the converted DVD movies from a folder right into iTunes, as long as they're in the correct format.
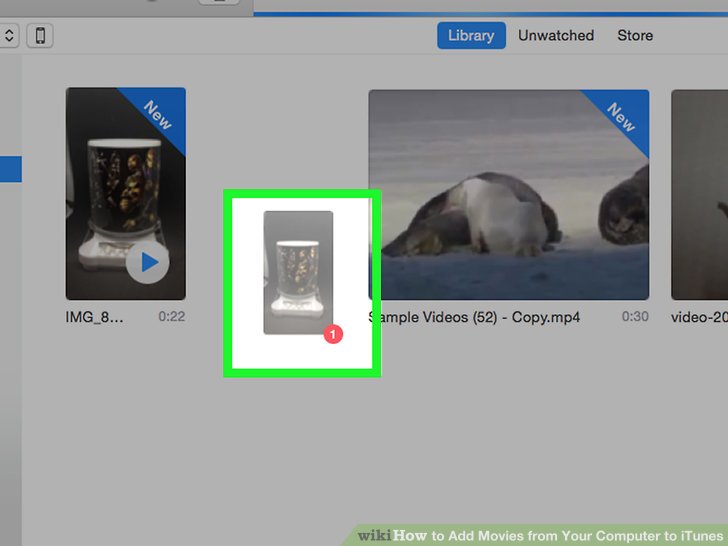
Tips: You can go to your iTunes and you can verify if the transfer has been successful by going to the iTunes library and typing the name of the file. If it is successfully transferred, A thumbnail of the video file will appear in your screen.
Connect iPhone/iPad and sync DVD files.
Connect the desired device to your Mac or Windows using a USB cable and your iTunes interface will show the connected device as an icon on the upper-left corner of the window. To sync the DVD video, click the content type that you want to sync under the settings on the left side window. On the right side panel, check the option for Sync Films and hit Sync at the bottom. iTunes will start syncing the library videos to your connected device. Click to see the official guide on sync media between iPhone/iPad/iPod and iTunes on PC/Mac
Way 3: Redeem digital copies of DVD in iTunes (Only for DVDs with Digital Copies)
Some DVDs might include an iTunes Digital Copy of your movie in addition to the physical disc. iTunes Digital Copy is a high-definition (HD) digital version of a movie that can be watched on your iPhone, iPad, iPod touch, Mac, PC, and Apple TV. To download your Digital Copy to your iTunes account, you will need to redeem the code directly on your portable device (iPad, iTouch, iPhone).
Redeem titles with just a redemption code
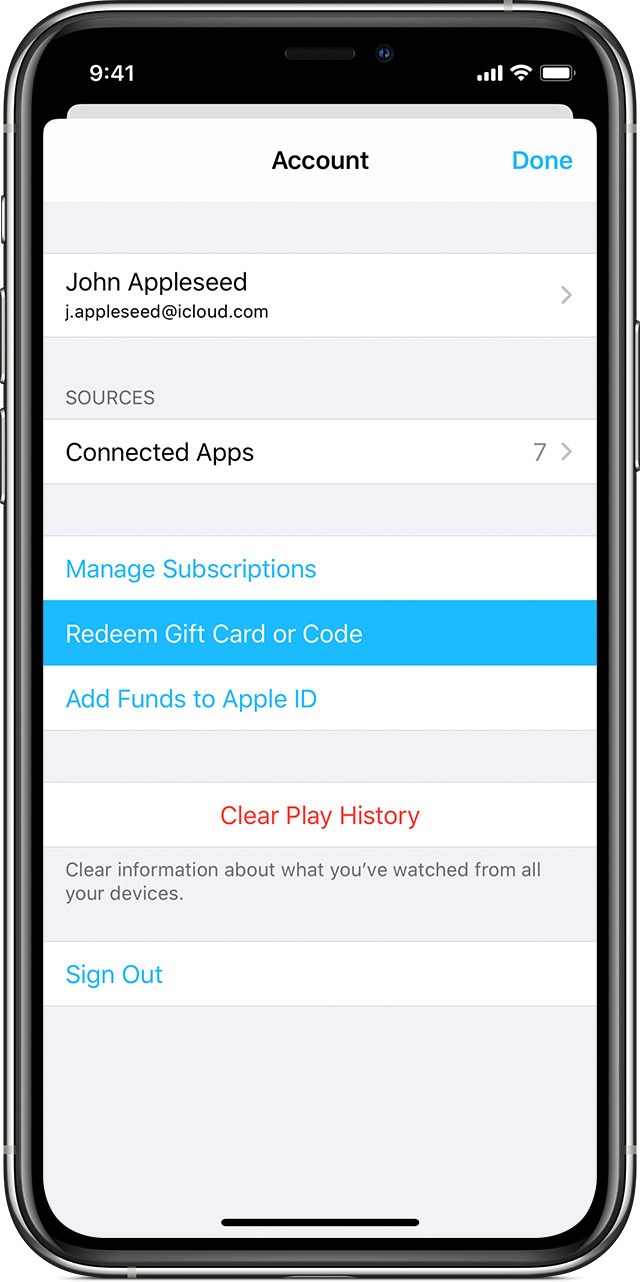
✔ On your iPhone, iPad, or iPod touch
1. Open the Apple TV app.
2. At the bottom of the screen, tap Watch Now.
3. In the upper-right corner, tap the profile icon x.
4. Tap Redeem Gift Card or Code. If asked, sign in with your Apple ID and password.
5. Tap You can also enter your code manually, then enter the 12-digit code printed on the insert included with your disc.
6. Tap Redeem.
Learn what to do if you can't redeem your content code.
✔ On your Mac or PC
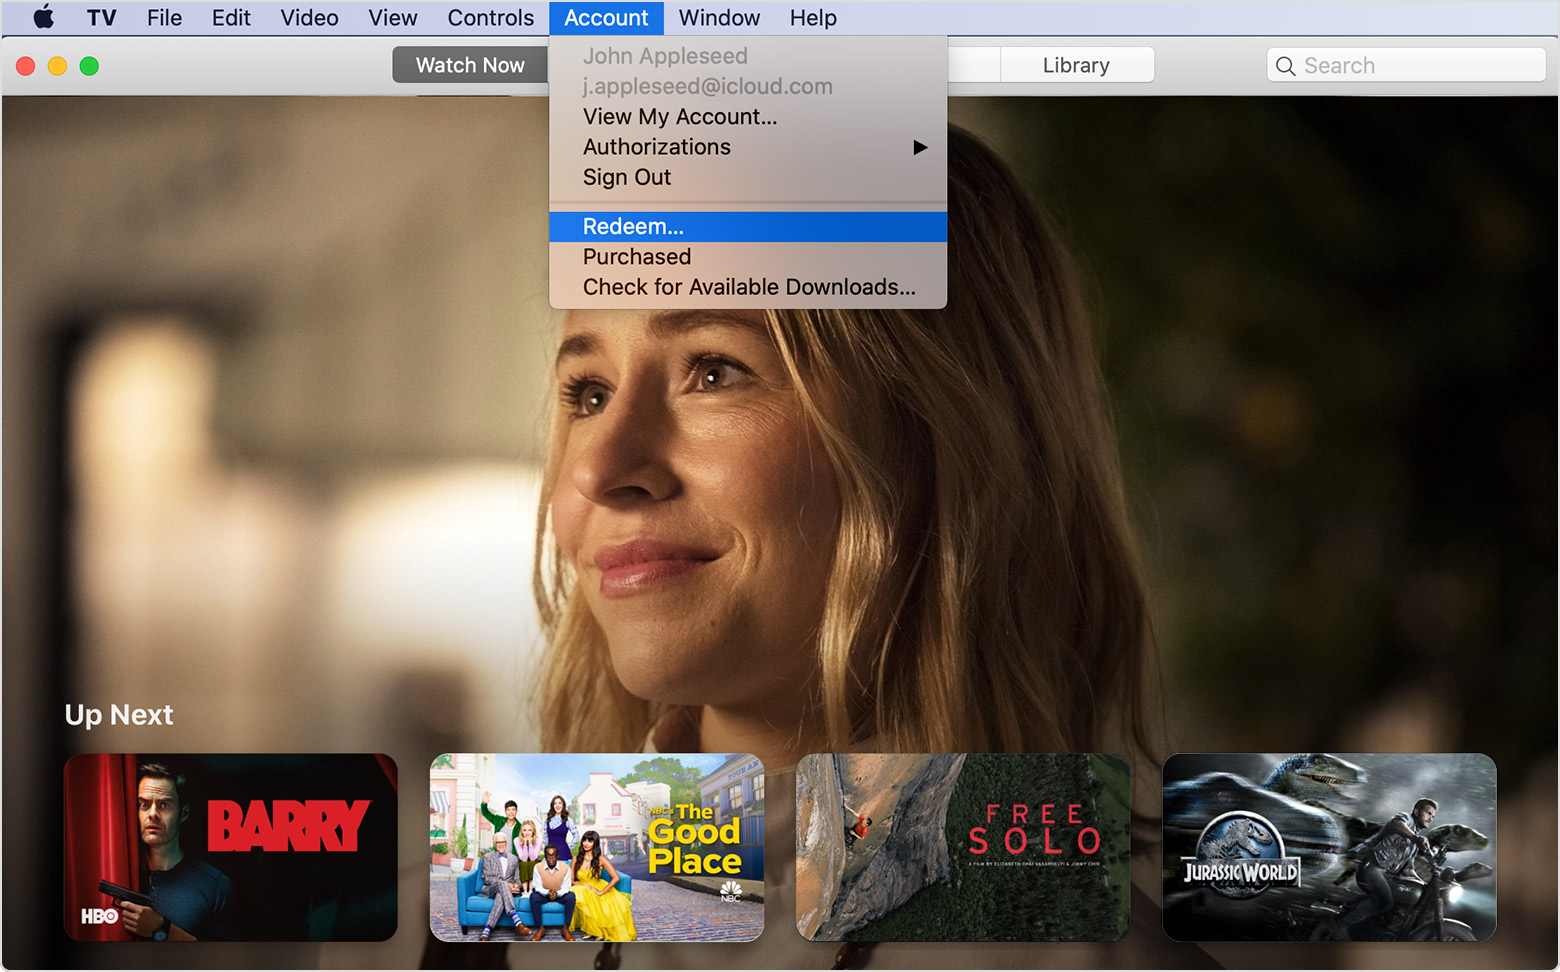
1. On your Mac, open the Apple TV app. On your PC, open iTunes for Windows. If you're not signed in, sign in with your Apple ID.
2. From the menu bar, choose Account > Redeem.
3. Enter your Apple ID and password, then click Sign In.
4. Enter the 12-digit code printed on the insert included with your disc. You might be able to use the camera on your Mac to redeem your code.
5. You can choose to download the digital copy of your movie now or download it later. Learn how to redownload purchases.
On Apple Support Community, Apple has made a very detailed guide on How to redeem digital copies of DVDs or Blu-rays in iTunes.