"I'm importing a mp4 file using Premiere Elements 12 on a Macbook Air running OS X 10.9.2. However, it doesn't appear to import, though a blank thumbnail appears in organizer. When I attempt to open the file, I get a missing codec error message. Help?"

Officially, Adobe stated that MP4 is supported by Premiere Elements 13/12/11/10. But the problem with MP4 is, when you plan to edit the MP4 file with Premiere Elements, you may be able to do this, but may be unable to. So what's the matter? Well, this depends on. The reason is that MP4 is a format container with different codecs. If your MP4 file codec isn't compatible with Adobe Premiere Elements, you will be unable to load them to Premiere Elements for editing or import without no sound or no video. In fact, there is an easy way to solve your problem. You just need to convert this MP4 video to other Premiere Elements friendly movie format like MOV, MPEG-2 or WMV.
Actually, it's not as difficult as you imagine. What you need is just a common video converter like EaseFab Video Converter for Mac, by running it, there's no need to set the codec by yourself: the Mac program has a optimized preset for Premiere Elements (PrE 13/12 included). It supports all regular format, including but not limited to Adobe Premiere, Premiere Elements, iMovie, AVI, MOV, MP4, M4V, MPG, Final Cut Pro, iDVD, etc. After MP4 files are converted, you can import to Adobe Premiere Elements without any hassle.
You can do it on All major Mac OS X operating systems, like Yosemite, Mavericks, Mountain Lion, Lion, and Snow Leopard. If you're using a Windows PC, please turn to EaseFab Video Converter, which supports transcoding MP4 to Premiere Elements files in Windows (Windows 8) without quality loss.
Download the MP4 to Premiere Elements converter:
How to convert and import MP4 files to Premiere Elements
This tutorial is based on Mac OS. The way to adjust MP4 to Premiere Elements file in Windows is almost the same. Just make sure that you've got the right program according to your system.
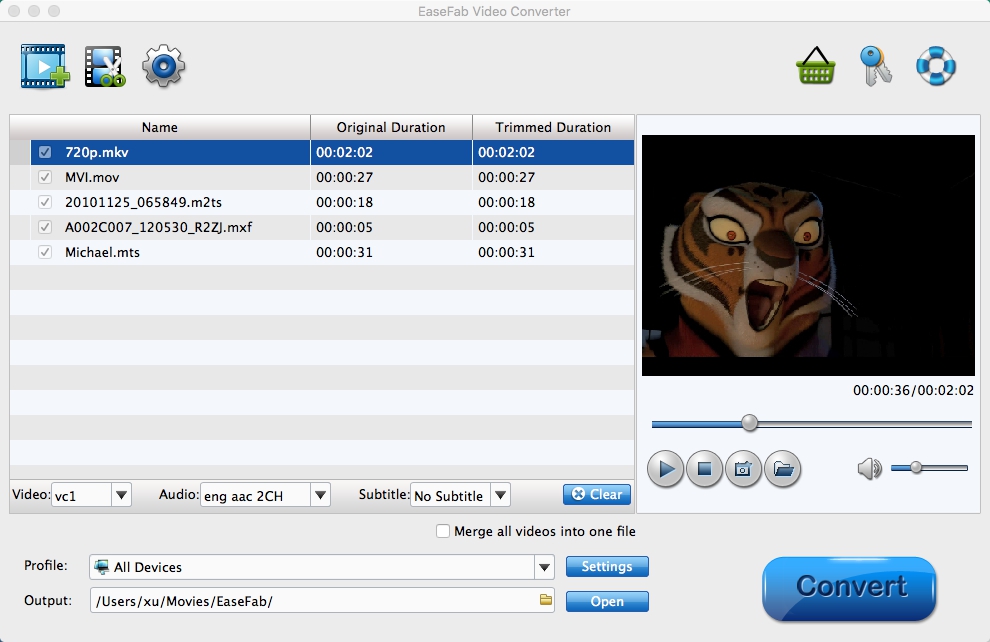
Step 1. Import MP4 video file
After the program installed, you will come to an impressive interface. Now add your MP4 video files. Two options:
1. Drag and drop the MP4 file to left item tray directly.
2. Click "Add Video" button to add MP4 files.
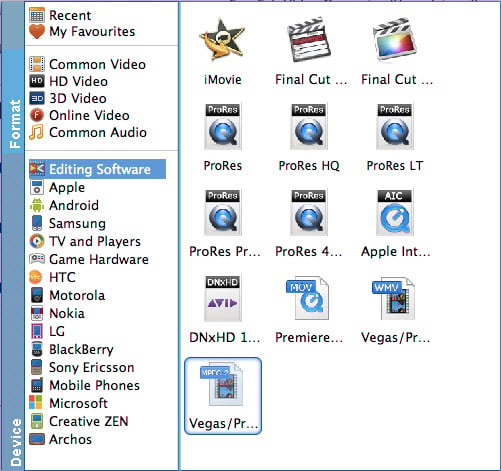
Step 2. Choose the optimized preset for Premiere Elements
The program has three already optimized the video settings for Adobe Premiere Elements. You can select MOV (Entitled Premiere), WMV or MPEG-2 from "Editing Software" as the output format. Here we recommend you choose MPEG-2 which can help you keep the original quality of MP4 video and seamlessly fit Adobe Premiere Elements 13/12/11/10.
Tips: The default setting works well. Of course, if you want to customize video and audio encoding settings, just click the "Settings" button to customize these settings. You can adjust the output video/audio resolution, frame rate, bit rate, etc. to customize the output files to get the best quality you want.
Step 3. Start Converting Now
Now, you get all things ready. Just click Convert. Then it begins to do the conversion work automatically, you can view the progress bar, and click suspend or quit if necessary. Now, you can easily drag the converted file to Adobe Premiere Elements 13/12/11/10, and do whatever you wanna do. It could have been so easy, right? Cheers.