"4K" has become the hottest word in the digital photography and video field in recent years. With the continually emerging of 4K products such as 4K camcorders (Blackmagic 4K, Panasonic Lumix GH4, Sony PXW-Z100, Sony FDR-AX100, JVC HM-200, Sony F55/F5, etc.), we can obtain as many 4K video as we wish. The point here, you will find it a painful experience when editing 4K footage in Adobe Premiere Pro (no matter Premiere Pro CC, CS6, CS5.5, CS5 or CS4). Your computer freezes when editing the 4K video. So, what's the fluid workflow for editing 4K in Adobe Premiere smoothly?
Thankfully you probably don't have to buy a new computer... In the professional world, 4K is a digital cinema standard that calls for a 4096 x 2160 pixel resolution. However, the majority of work is still being finished in 1080p. So before importing the 4K footage to Premiere for smooth editing without crashing your computer, you'd better downscale 4K footage to 1080p and transcode the 4K stuff (formatted/encoded in XAVC, XAVC S, MP4, MOV, MXF etc.) to a more-editing friendly format, such a Premiere's MPEG-2. In the following article, we will show you how to downscale and convert 4K to 1080p MPEG-2 videos so that you can edit 4K footage in Adobe Premiere without bogging down your computer. The process is surprisingly easy and can be done using EaseFab Video Converter (Video Converter for Mac).
First, free download the 4K Video Converter trial version:
Developed with the most advanced converting technology, this 4K video converter truly and fully supports input and output videos at upto 4K resolution. With it, you can effortlessly convert your 4K videos formatted in MP4, XAVC, XAVC S, MXF to advanced encoders like MPEG-2, Apple Intermediate Codec, ProRes and DNxHD, ensuring maximum editing quality and efficiency when working with Adobe Premiere, iMovie, Final Cut Pro, Avid Media Composer, etc. If you're facing problems when editing 4K footage, just download it to convert the 4K stuff for smoothly importing and editing in your editing systems. Below are steps on converting 4K footage for Adobe Premiere Pro.
Guide: Downsacle & Convert 4K Video For Editing in Premiere
Step 1. Load your 4K videos
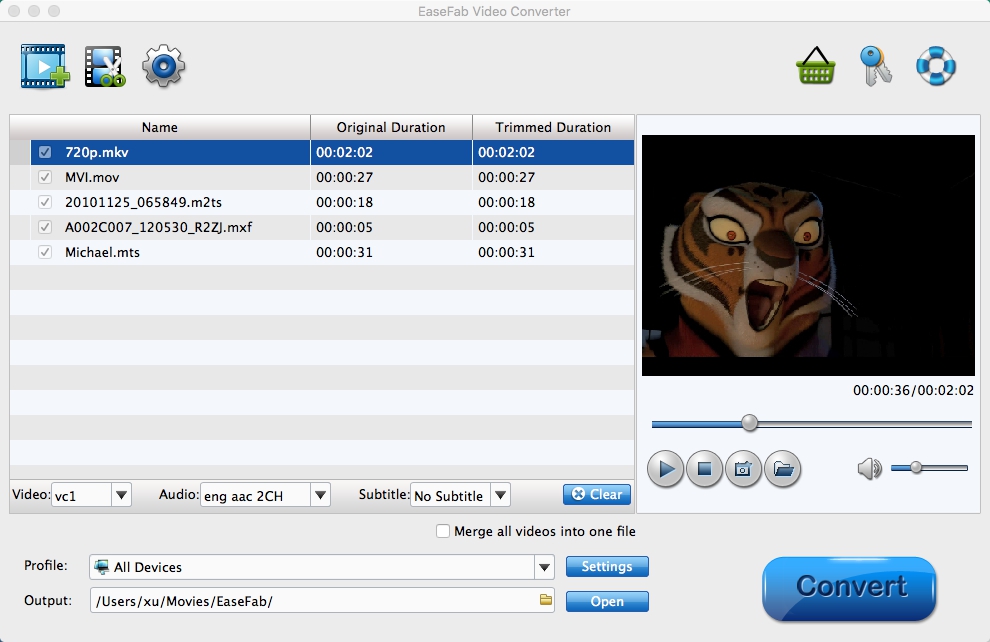
Launch the 4K to Adobe Premiere converter, then drag & drop the 4K files onto the main interface, or you can click the "Add Video" button to locate the videos from your local disk. Batch conversion is available here, so you are allowed to import several files at one time.
Step 2. Choose the optimized preset for Premiere
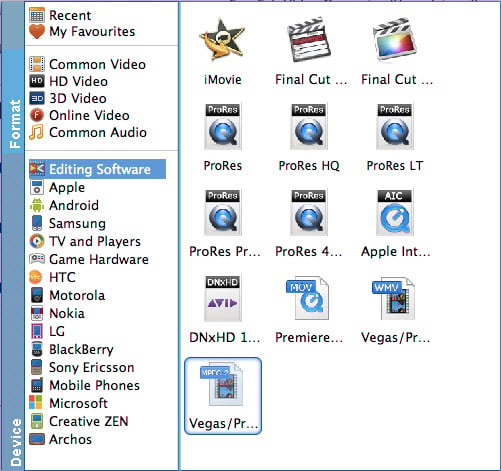
The program has three already optimized the video settings for Adobe Premiere. You can select MOV, WMV or MPEG-2 from "Editing Software" as the output format. All output videos will seamlessly fit Adobe Premiere Pro CC, CS6, CS5.5, CS5, CS4 and more. Here we recommend you choose MPEG-2.
Tips: Click "Settings" button if you'd like to customize advanced audio and video parameters like Video Codec, aspect ratio, bit rate, frame rate, Audio codec, sample rate, audio channels.
Step 3: Start converting the 4K footage
When everything is ready, simply click the big "Convert" button and the program will start transcoding 4K videos to MPEG-2 files. Soon after the conversion, just click "Open" button to get the generated files for natively editing in your Adobe Premiere Pro CC, CS6, CS5.5, CS4 or CS4.