The Hero4 Black is the company's new flagship camera targeted at pros and anyone who wants the best damn video you can get from an action cam. Twice as powerful as its predecessor's, it allows you to record at up to 4K resolution at 30 frames per second while its step-down model, the Hero4 Silver records video at up to 4K at 15fps, a more useful 2.7K resolution at 30fps, and perhaps more importantly 1080p at 60fps and 720p at 120fps. Both the GoPro Hero4 cameras can make for some very smooth video when shooting fast-moving scenes, as well as nice slow-motion clips.
The same as its predecessors, the the higher-end Hero4 camera records in MPEG-4 and outputs its files as .MP4 files. Files are compressed using the h.264 codec. So the files you are getting out of GoPro Hero4 Black/Silver are suited to be delivered as is, which is usually not what you want. If you want to import the (4K) MP4 videos from GoPro Hero4 to Adobe Premiere Pro CC/CS6/CS5 for editing, you first need to convert GoPro MP4 to a more editing-friendly format, such a Adobe Premiere's MPEG-2.
To transcode GoPro MP4 footage for editing in Premiere, you're highly recommended to use EaseFab Video Converter for Mac. By running it, there's no need to set the codec by yourself: the Mac program has a optimized preset (MPEG-2) for Adobe Premiere Pro (Premiere Pro CC included). Besides Premiere, this program can also export DNxHD for Avid, Apple ProRes for Final Cut Pro, Apple InterMediate Codec for iMovie and more NLE systems for editing. If you're running a Windows PC, please turn to EaseFab Video Converter, which supports converting GoPro MP4 to Premiere supported file format in Windows (Windows 8 included). Just get the right program according to your system and follow the steps below to learn how to get GoPro 4K/2.7K or HD footage support in Adobe Premiere Pro CC/CS6/CS5.
Download the GoPro Video Converter:
How to convert GoPro footage for Adobe Premiere
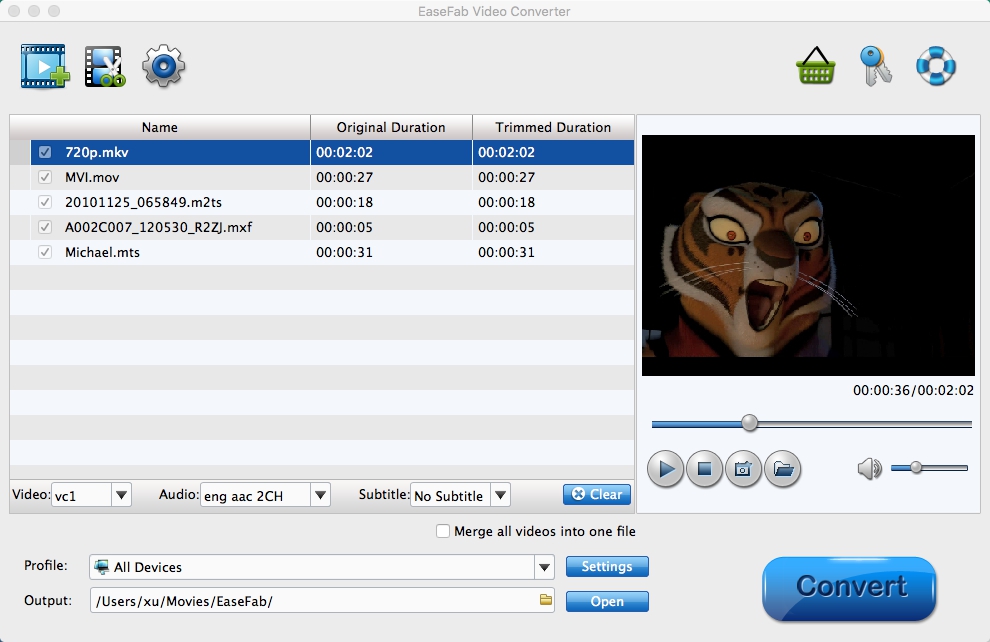
Step 1. Create a folder with the original GoPro *.MP4 files on your hard drive. Launch EaseFab Video Converter for Mac, and select all your .MP4 files in your folder, drag & drop them into the Software Window.
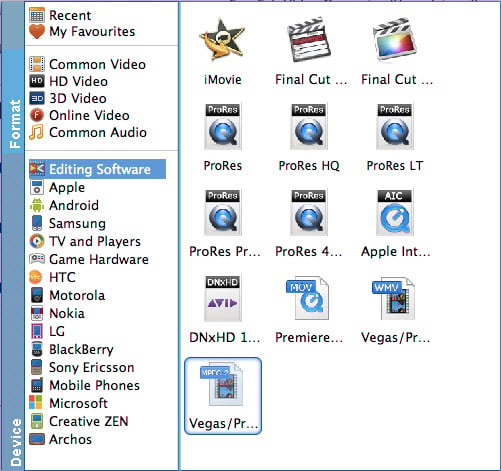
Step 2. Click Profile (located below where your files are displayed) and select the MPEG-2 format as the output format from the "Editing Software" category.
Step 3. Set Advance Settings (Optional) - The default setting works well. Of course, if you want to customize video and audio encoding settings, just click the "Settings" button to customize these settings. You can adjust the output video/audio resolution, frame rate, bit rate, etc. to customize the output files to get the best quality you want.
Step 4. When everything is OK, simply click "Convert" and your files will be converted into MPG files ready to imported into Adobe Premiere Pro CC/CS6/CS5/CS4.
You're done!