Summary: Here is a simple guide on how to digitize and rip your Blu-ray collection and store them on Synology NAS so that you can easily manage and access Blu-ray movies using Plex, DLNA and more.
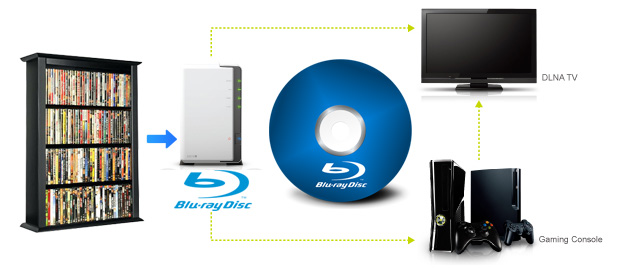
Synology NAS is a good investment for people who has limit storage space at home. It can serve as a multimedia server on the local area network, allowing home devices, such as TVs/stereo systems and Sony PS3, PS4, Xbox 360, etc., to play its multimedia contents. While you may get your movies and TV shows digitally, you probably still have a Blu-ray collection. You can certainly watch these Blu-rays the usual way, with a Blu-ray player, but wouldn't it be great to store these Blu-ray movies to your Synology NAS, so you can conveniently manage and access them with DLNA/UPnP-compliant DMAs? Ripping Blu-rays for Synology NAS on a PC or Mac is simple as long as you got a Blu-ray ripping tool. Here is how to do it.
What You Need
In order to rip those Blu-ray movies and store them on Synology NAS, you'll need a few things:
● A Windows or Mac computer
● A Blu-ray drive: Obviously, you'll need an optical drive in your PC that can read Blu-ray discs — a DVD drive is not enough. You can buy an external one that connects over USB, or an internal one for your desktop — either is fine. An external good Blu-ray drive can be purchased for as little as $25.
Note: If you want to rip 4K UHD Blu-rays, you'll need to get a 4K Blu-ray drive.
● A program to rip the Blu-ray discs. We'll be using EaseFab Blu-ray Ripper in this guide. There are versions for Windows and Mac.
Why choose EaseFab Blu-ray Ripper for ripping Blu-ray discs to Synology NAS
EaseFab Blu-ray Ripper earns its award as the top-ranking Blu-ray ripping software mainly due to rich features, super fast-processing, clean, safe and stable functions. It can help you copy and transfer any home-made or copy-protected Blu-ray (DVD) to Synology NAS in 3 simple steps. With it, you can rip Blu-rays yet DVDs to various digital formats e.g. MP4, h.264, HEVC, MKV, AVI, WMV, MPEG, MOV, FLV, etc., or copy BDMV folder/DVD folder in 1:1 ratio or a single M2TS/VOB file. It can easily handle Blu-ray discs with AACS encryption, BD+ and the latest MKB technology and decrypt DVDs with CSS, RCE, Sony ArccOS, UOPs, Disney X-project DRM, etc. on both Windows and Mac.
This is all you need. Once you have all three of these things ready, grab your favorite Blu-Ray movies and get started to digitize them for saving to your Synology NAS.
Best Video Format for Ripping Blu-ray to Synology NAS
MP4, being the top answer in most Blu-ray backup and video re-encoding cases, is what we suggest this time, especially MP4/H.264. Technically speaking, MP4 is a media container, storing videos encoded in MPEG-4 and H.264. Out of the best video compressing algorithm, H.264 reaches the best balance between file size and quality. That's why even you don't care about space any more, which is exactly the selling point of Synology NAS, we still take MP4 as the best one.
Steps of Copying Blu-rays to Synology NAS for Streaming and Playing on Plex?
To begin with, you need to download and install EaseFab Blu-ray Ripper Windows or Mac version above according to your computer operating system. After this, you can move to the following steps to rip your old and new Blu-rays to MP4 for Synology NAS. If you want to rip your DVDs to Synology NAS, this process will work as well, but we'll focus on digitizing Blu-rays.
Step 1: After downloading, install and launch EaseFab Blu-ray Ripper. Insert your Blu-ray disc into your Blu-ray drive and click Load Blu-ray button to upload to Blu-ray movie. EaseFab Blu-ray Ripper can auto detect the right Blu-ray movie title for you. At the bottom, you can select your desired subtitle and audio track.

Step 2: Select an output video format for transferring to Synology NAS. You are recommended to convert your Blu-rays to MP4 so as to store Blu-ray movies on Synology NAS well-organized. Well, H.264, WMV, MOV, MKV or devices iPhone/XS, iPad, Samsung and many more are all accessible. The main title will be auto selected when ripping protected movie Blu-rays.

Tip: With the right settings you can retain the quality of the original Blu-ray movie while also saving space. This is particularly helpful when streaming over your network, depending on your network quality. Simply click Settings button and you can tweak the settings to your satisfaction and even save it as preset.
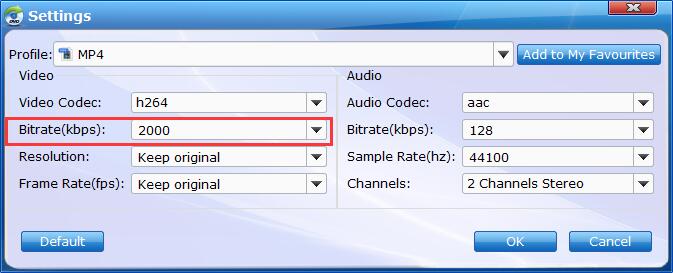
Recommended settings for ripping Blu-rays to Synology NAS:
1. You're not suggested to adjust the frame rate and aspect ratio, if not necessary.
2. Adjust Birtrate. You're suggested to adjust the original Normal quality to bitrates of around 1800-2000. This will help you keep a balance between file size and quality of the ripped MP4 video.
3. Lower the resolution. Typical Blu-ray videos are 1920×1080 (Full HD). Adjust the resolution to lower 1280×720 or higher won't make any quality difference.
Please note: Adjusting these variables have some effect on the re-encoded video quality. Remember the file size and video quality is based more on bitrate than resolution which means bitrate higher results in big file size, and lower visible quality loss.
Step 3: Finally, hit the Convert button at the bottom of the main interface to start the conversion. It will automatically convert Blu-ray to Synology NAS compatible video files.
Once the conversion is finished, click Open to quickly find the converted movies. Now you're ready to transfer and store the Blu-ray rips on your Synology NAS and ultimately manage and access using Plex, DLNA and more.