When it comes to backing up a Blu-ray disc, you may want to remux the file from the Blu-ray disc directly into a MKV format container for uncompressed rip. After re-muxing, you can this the MKV file as input for another program, use any player to watch it in about any platform or just store it in your hard drive as a backup.
In this article, we will share with you two methods for remuxing a Blu-ray disc to MKV. One is free, another is paid. The free method is complex cause you need to use three tools to rip a Blu-ray disc, demux it and then remux it to mkv format separately. If you don't mind that the software needs to be paid, the process of remuxing Blu-ray to MKV will be much easier. Both the two ways you will get a huge, but unprotected, easy to use and store mkv file that contains the exact video and audio streams as your Blu-ray disc quality and size-wise. Now, you can remux Blu-ray disc to MKV files using your preferred method.
Method 1: Free Rip a Blu-ray disc and Remux It to MKV
To freely rip Blu-ray disc and remux it to MKV file, you need the below three software. You can download it from clicking the links.
tsMuxeR: It is a transport stream muxer that supports most HD input formats such as H.264/VC-1 and E-AC3/DTS-HD, and can output to Blu-ray's M2TS.
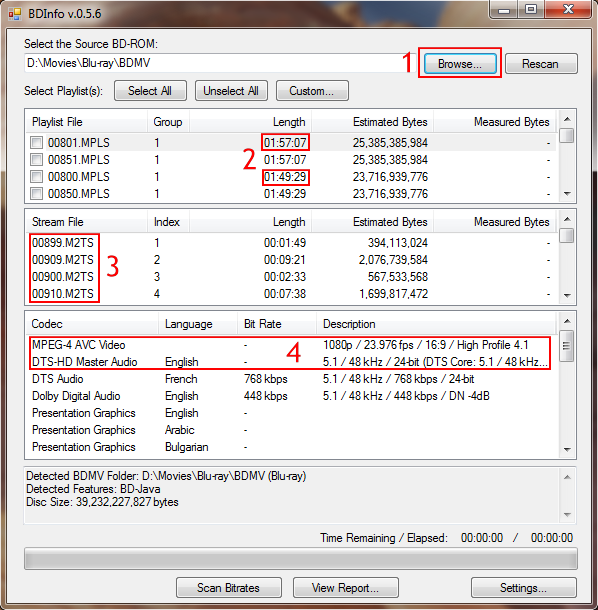
BDInfo: This software was designed to collect video and audio technical specifications from Blu-ray movie discs, including disc size, playlist contents, video, audio, subtitle and graphics stream codec details and bitrates.
mkvtoolnix: It is a set of tools to create, alter, split, join and inspect Matroska files(mkv). With these tools one can get information about (mkvinfo) Matroska files, extract tracks/data from (mkvextract) Matroska files and create (mkvmerge) Matroska files from other media files.
Guide to Re-muxing Blu-ray to MKV Freely
Step 1: Before you start remuxing Blu-ray to MKV, you need an unlocking software to circumvent the Blu-ray's protection. You can use a Blu-ray ripping tool to remove Blu-ray protection.
Step 2: Now, open up BDInfo. We can determine which file is the main title with this application. Click Browse to select the BDMV folder in your Blu-ray disc and then check out which playlist contains the movie, obviously the one with the biggest length and check its name. Now, leave BDInfo open and run tsMuxeR.
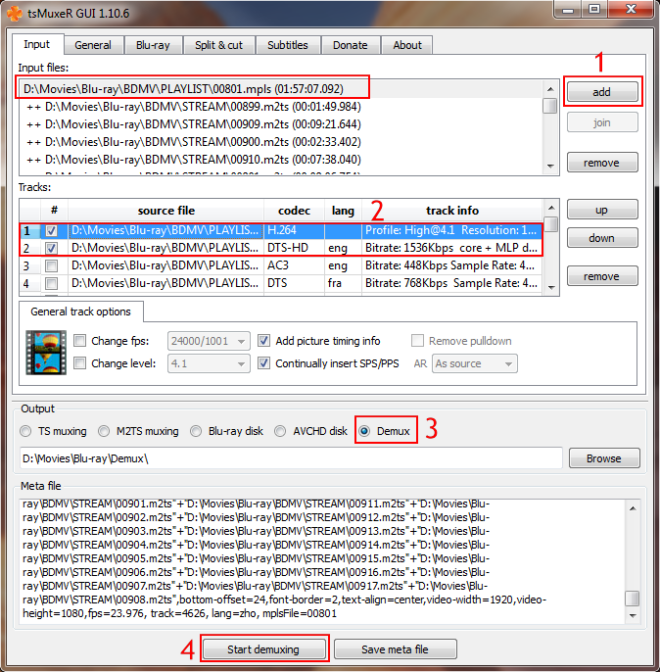
Step 3: Add (1) the playlist file that we have already found in BDInfo. tsMuxeR will automatically load all the m2ts files assosiated with it. Once the main movie is loaded and ready for extraction, select the main video track, the audio that you want to keep and any subtitles (2) you may need later on. Then set output to Demux (3) and after you set the location of the output files, click Start demuxing(4).
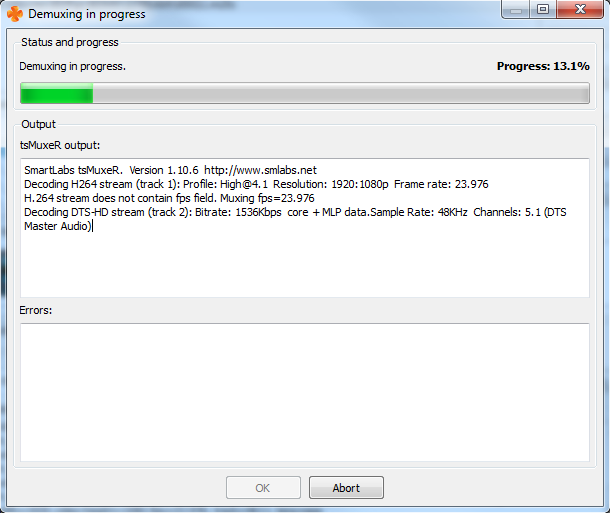
Step 4: tsMuxeR will now copy the tracks you have selected to your hard drive. This process will take from about 45 to 90 minutes, depending on the speed of your Blu-ray drive and the size of the disc. When it is done, click OK and close tsMuxeR. Next step is to create our mkv file, so run mkvmerge GUI (named mmg.exe in the archive you have downloaded).
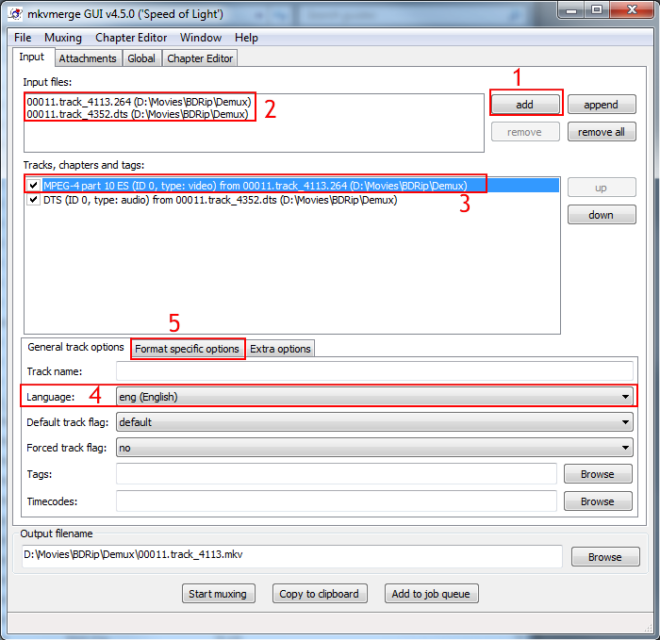
Step 5: Now, run mkvmerge GUI and then click add (1) and and select all the files that we demuxed before (2). You can also add subtitles in Blu-ray's .sup format. Now we need to set some options. Select the video track (3), set the language (4) and then click the Format specific options (5) tab.
Step 6: Here you need to add the FPS value exactly as the one you wrote down at Step 2.

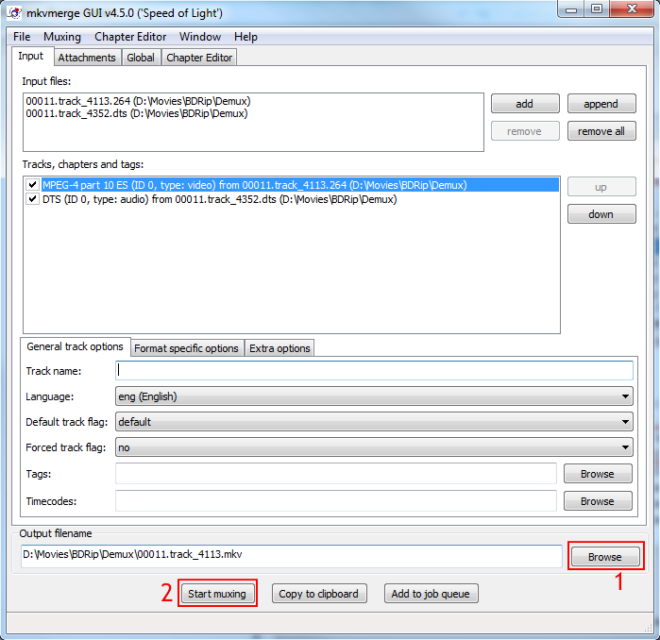
Step 7: Feel free to add the correct language to any other audio or subtitle tracks you may have and when you are ready Browse (1) to set the output filename and click Start muxing (2) in order to start the process.
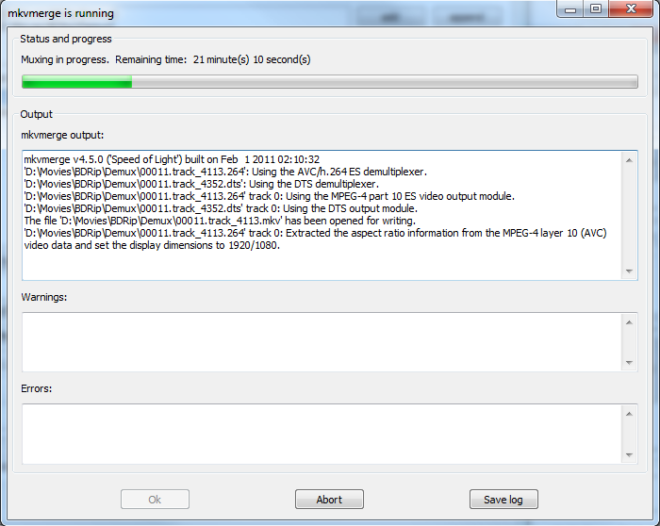
Step 8: That's it. A few minutes later you will have an mkv file containing the exact video and audio streams of your Blu-ray disc. You should delete all the files tsMuxeR created as you no longer need them. You can now test your mkv file using any player that supports that format and then use it as you please.
Method 2: Easier and Faster Way to Remux Blu-ray to MKV
This way will be much easier and faster than the method 1 to remux Blu-ray to MKV. And you can finish the remuxing process with only one software called EaseFab LosslessCopy in 3 simple clicks. Euiped with multiple advanced technologies to boost ripping speed, you can probably finish ripping and remuxing a Blu-ray to lossless MKV within 5 minutes only. Besides lossless MKV, LosslessCopy can also convert video clips from almost all encrypted Blu-ray/DVD discs into MP4, MKV, AVI, WMV, 3GP, FLV, other mainstream video formats with good balance between image quality and file size.
EaseFab LosslessCopy has top performance when it comes to ripping and copying Blu-rays & DVDs, such as:
▶ It can rip any commercial and homemade Blu-ray and DVD discs. It automatically ticks the right title and delivers high-quality output in order. No crashes. It can also deal with UHD 4K discs.
▶ It provides 320+ different output formats. LosslessCopy is able to convert Blu-ray/DVD to MP4, AVI, MKV, MOV, FLV, MPEG MP3, AAC, M4A and other mainstream video/audio formats.
▶ It offers a library of preprogrammed optimization profiles for specific devices such as smartphones, tablets, gaming systems, smart TVs and more.
▶ 1:1 Disc Backup: Directly Copy main movie from BD/DVD discs and leave out extras; 1:1 Backup original Blu-ray and DVD to computer hard drive with all languages, subtitle tracks and chapter info; Lossless rip DVD/Blu-ray to MKV with full video, audios, subtitles, menus and chapters.
▶ Advanced Customization tools: LosslessCopy allows you to manually adjust codecs, aspect ratios, bit-rates, frame rates and more before you rip a DVD or Blu-ray. Also, it includes a basic video editor you can use to trim away unwanted footage, crop video, add watermarks and edit subtitles.
▶ With the Intel QSV and NVIDIA CUDA powered hardware acceleration, the conversion is processed on GPU instead of your computer's CPU and you can convert a full DVD disc to H.264 MP4 as short as 10 minutes.
3 Simple Steps to Remux Blu-ray to MKV using LosslessCopy
Step 1: Load Blu-ray movies
Insert the Blu-ray disc to the BD drive and then click the Load disc button to have Blu-ray movies uploaded to EaseFab LosslessCopy. You can also import DVD files, BD/DVD ISO files, IFO files or Blu-ray/DVD folder for conversion.
Note: When importing a Blu-ray disc, please make sure that your PC has been equipped with an external or internal Blu-ray drive to recognize your Blu-ray disc.
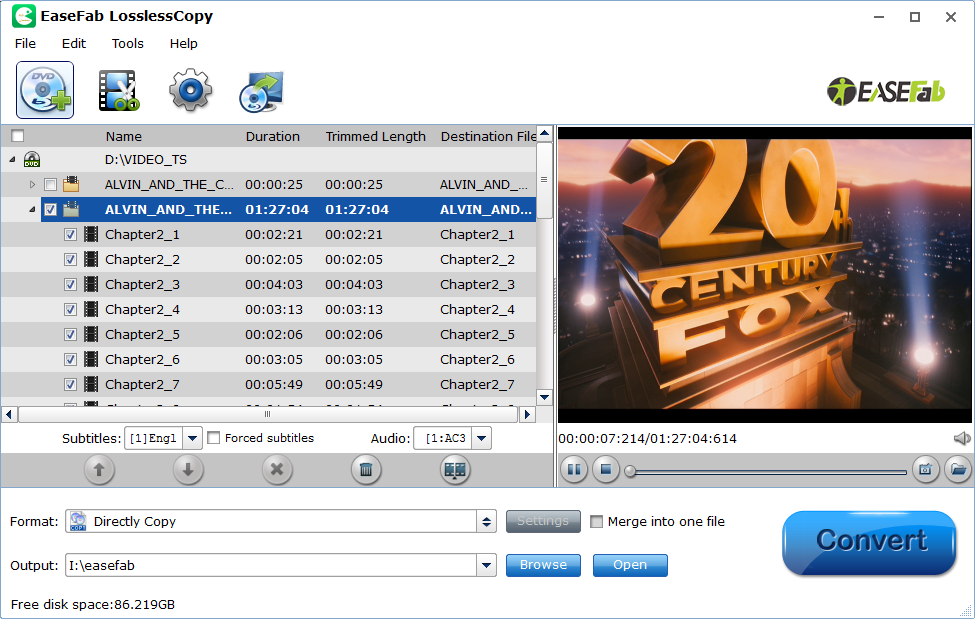
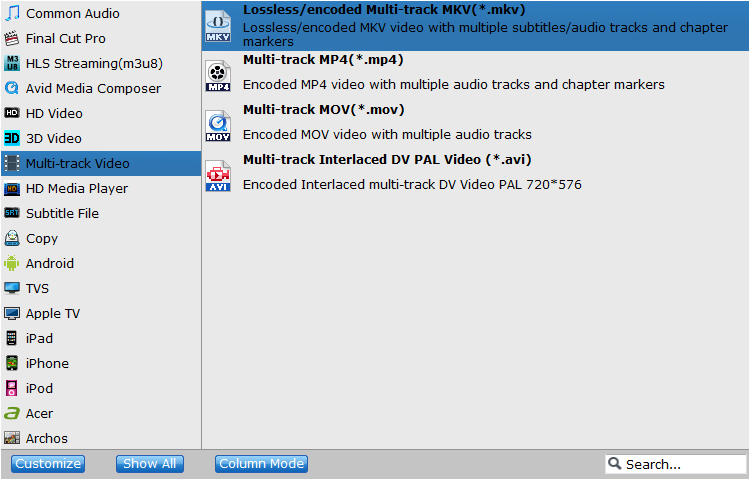
Step 2: Choose MKV remux format
Click Format bar, move mouse cursor to Multi-track Video category and select Lossless/encoded Multi-track MKV (*.mkv), which enables you to get thelossless MKV video with all audio tracks and subtitles streams.
Step 3: Start to remux Blu-ray to MKV
Hit on the Convert button on the main interface to start to remux Blu-ray to lossless MKV without quality loss. Once the process ends, open the output folder to locate the MKV files.
The Verdict:
It is obviously that the method 2 is much simpler than the mothed 1. With the method 2, you can remux Blu-ray to MKV with only one program within 3 clicks. After you get the Blu-ray quality MKV files, you can watch the MKV movies on VLC video player, Plex, KMPlayer and other MKV video players on Windows. You also can stream the Blu-ray MKV rips on PS4 Pro, Xbox One X which support MKV files.