As we all know, the recorded video format by Panasonic P2 camcorders, Canon XF series camcorders, etc., is MXF, which is the abbreviation of Material eXchange Format. It is an open file format, targeted at the interchange of audio-visual material with associated data and metadata. After recording some video files with the .MXF extension, you may want to import them to Adobe Premiere Elements to make them more stylish while you'll find it's a painful experience to import and edit MXF files in Premiere Elements. Below are some related topics:
"I have recorded several videos on a Canon XF 100 and can view the footage using the canon utilities software. However, I cannot upload the video from the card reader to Premiere Elements 11
I have tried using the following route + Add Media then selecting Videos from Flip or cameras
The Canon XF comes up in the source menu but in the window below the following message appears"
"Any ideas on how to use .mxf from my canon xf100 with elements? Also, I don't see a setting in the menu when I'm starting a project?"
According to our tests, you can directly import the MXF files to Premiere Elements on Mac while you cannot do that on Windows. To use MXF files in Premiere Elements on Windows, you may have to change the extention from MXF to MPG or other Premiere Elements editing-frinedly codec. Along with some help from a third-party program like EaseFab Video Converter, you can easily convert MXF files to Premiere Elements highly-compatible MPEG-2 video files without any quality loss. Now download the program and follow the step-by-step guide to start converting MXF to MPEG-2 for Premiere Elements.
PS: Although, the Mac has no problem importing the mxf files, people still fail to load MXF files to Premiere Elements due to some unknown reasons. It would be very time consuming for you to find out the reason by yourself. The best simple way is transcoding MXF fieles to Premiere Elements.
Converting MXF files to MPG for Premiere Elements
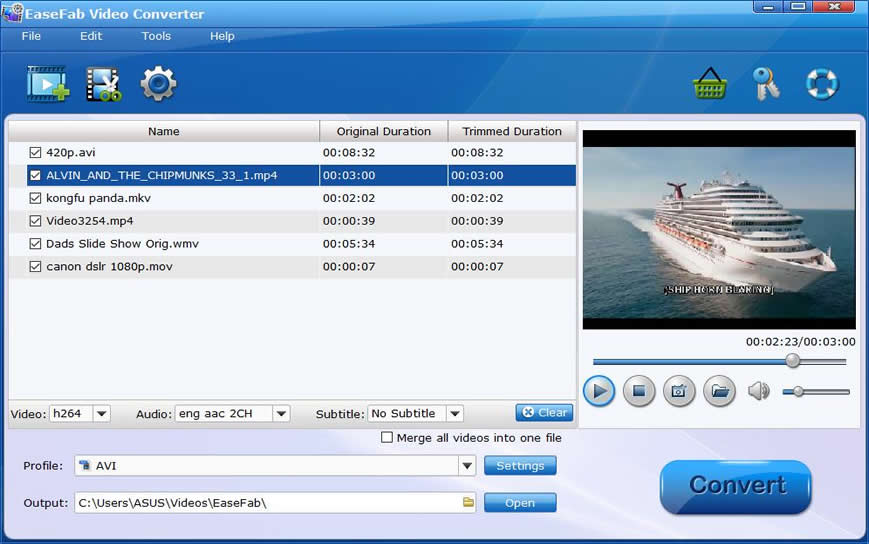
Step 1. Import MXF files
Click the button "Add Video" button to add MXF files (or directly drag and drop your files) to the Converter. (Note: batch conversion is supported, so you can load more than one file to save time.)
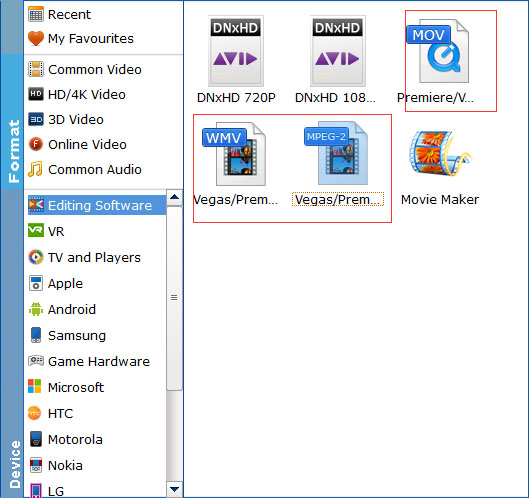
Step 2. Selec output format
The program has three already optimized the video settings for Adobe Premiere Elements. You can select MOV, WMV or MPEG-2 from "Editing Software" as the output format. Here we recommend you choose MPEG-2. The output videos will keep the original quality of the MXF videos and seamlessly fit Premiere Elements 15, 14, 13, 12, 11, 10, etc.
Tips: The default setting works well. Of course, if you want to customize video and audio encoding settings, just click the "Settings" button to customize these settings. You can adjust the output video/audio resolution, frame rate, bit rate, etc. to customize the output files to get the best quality you want.
Step 3. Start the conversion
Click the convert button under the preview window, the MXF converter will start converting MXF for importing to Premiere Elements. Soon after the conversion is finished, just click "Open" button to get the generated files which is ready to be imported to Premiere Elements for smooth editing.