
Blu-ray Ripper for Mac Quick-Start Guide
 Download Apple Silicon(ARM) Version (For M-series chips)
Download Intel Chip(x86_64) Version (For Intel Core processors)
EaseFab Blu-ray Ripper for Mac is an all-in-one and easy-to-use Blu-ray yet DVD ripping application designed for Mac(Yosemite/Mavericks included) users. It helps you rip Blu-ray/DVD to various video and audio formats so that you can watch them on various media players, devices and make them compatible with other Windows applications. What's more, you can effortlessly backup Blu-ray/DVD without quality loss with this smart Blu-ray ripping tool.
How to Rip and Convert a Blu-ray or DVD?
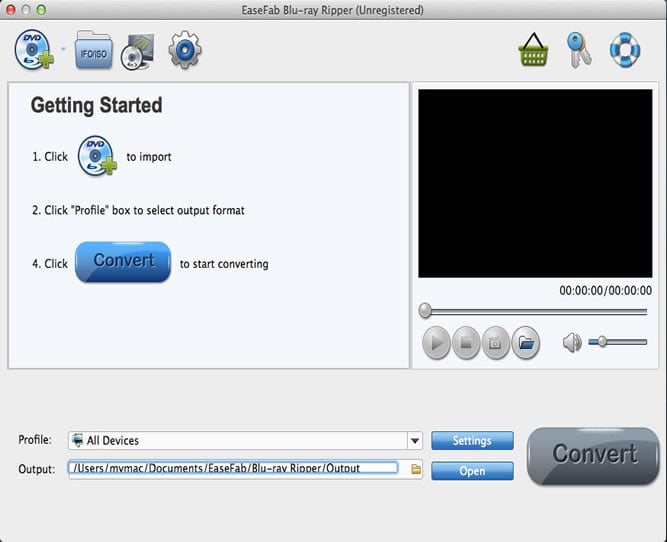
Load the source Blu-ray/DVD Files
Insert the Blu-ray disc to the Blu-ray Disc drive or DVD to the DVD-ROM and click the ![]() button to have movies uploaded to the Blu-ray Ripper for Mac. Here you can also import Blu-ray/DVD folders, ISO files and IFO files to convert.
button to have movies uploaded to the Blu-ray Ripper for Mac. Here you can also import Blu-ray/DVD folders, ISO files and IFO files to convert.
Tips: A Blu-ray or DVD may contain many titles more than the main movie, such as the trailers or commercials. By default, EaseFab Blu-ray Ripper choose the longest title which is usually contains the main movie. And this helps ripping without converting unnecessary titles. And double-click one of the titles, and you can preview the movie in the Preview window on the right.
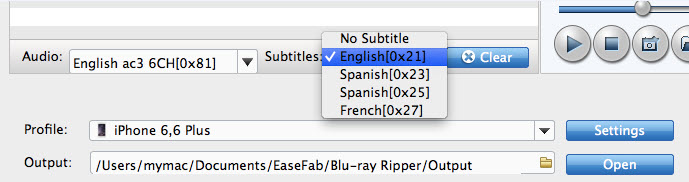
Select One Audio and Subtitle Track (Optional)
Once the files are loaded, you can select one of audio or subtitle tracks you prefer from the corresponding drop-down Audio or Subtitle lists. As you see, you can also select Forced Subtitles if the movie contain forced subtitles. You can also add external subtitle to your Blu-ray movie if there is unwanted subtitle track there.
If you skip this step, by default, the program will select the first audio track and select no subtitle.
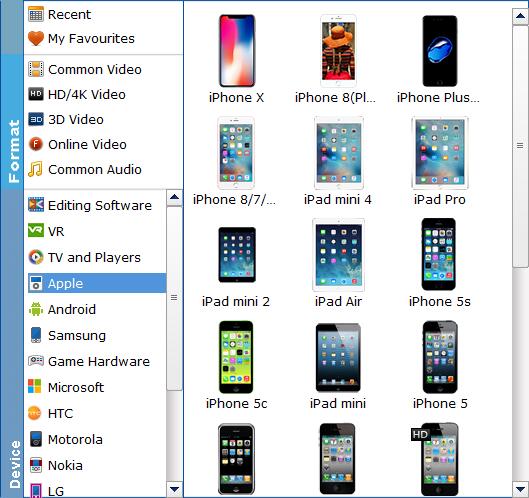
Select an export format or device and destination folder
Click Profile (located below where your files are displayed) and select the format you want from the drop-down list. Just below Profile is Output, here you can browse your computer for a better destination folder for the Mac Blu-ray Ripper to save your converted movies. As you see, all regular SD/HD and even UHD 4K video and audio formats like MP4, MOV, MKV, WMV, AVI, FLV, MP3, WMA, WAV, M4A, etc. are provided.

If you want to convert your Blu-ray/DVD movies for play on portable devices, including iPhone, iPad, iPod, HTC, Samsung Galaxy Tab S, Galaxy S5, S4, Nokia, SSony, PSP, Xbox One and more, you can simply browse to find the icon of your device and select it as the output format to get videos with optimized settings. All Idevices output files can be synced to iTunes automatically.
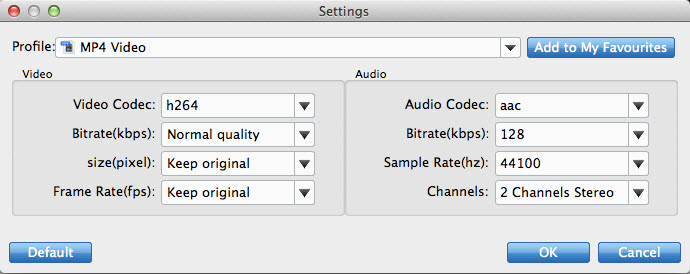
Tips: The default setting works well. Of course, if you want to customize video and audio encoding settings, just click the Settings button to customize these settings. You can adjust the output video/audio resolution, frame rate, bit rate, etc. to customize the output files to get the best quality you want.
Edit the Blu-ray or DVD files (optional).
You can click ![]() button to personalize and touch up your videos in clicks. Video editing functions like Trim, Crop, Effect, Watermark, etc. are provided.
button to personalize and touch up your videos in clicks. Video editing functions like Trim, Crop, Effect, Watermark, etc. are provided.
Start conversion
Once you've selected the output file format you want, you're ready to rip. Simply click the ![]() button to let the software start converting your Blu-ray or DVD files. The ripping time depends on the quality and duration of the output movie. Wait for the conversion to be done and click Open to get the converted video files.
button to let the software start converting your Blu-ray or DVD files. The ripping time depends on the quality and duration of the output movie. Wait for the conversion to be done and click Open to get the converted video files.
How to Losslessly Backup a Blu-ray or DVD within one Minute on Mac
>Besides ripping, the EaseFab Blu-ray Ripper for Mac also offers enough freedom for all movie lovers like you to back up your favorite Blu-ray and DVD movies in a personalized way. Two different copy modes: Title Mode and Full Disc Mode are provided to let you copy the exact movie part you want. Just select your wanted one. Either of the backup method can help you backup your DVD movies within one minute!
Add Blu-ray/DVD movie
Insert the Blu-ray disc to the Blu-ray drive or DVD to the DVD-ROM, then click the Load Blu-ray/DVD button to import movies.
Select an output folder
Specify a folder to store backed-up video files by clicking Folder button.
Note: if you are backing up a Blu-ray disc, please make sure the storage place is around or above 30GB.
Choose and start to backup
Click ![]() button and the disc copy window will pop up. Then you can choose Title Mode: Copy the selected movie title and click Continue to let the software copy the main movie from your DVD.
button and the disc copy window will pop up. Then you can choose Title Mode: Copy the selected movie title and click Continue to let the software copy the main movie from your DVD.
By default, the Blu-ray/DVD copy software choose the longest title which is usually contains the main movie. And this helps copying without backing up unnecessary titles. If you want to copy other titles, just tick the Title you want to copy.
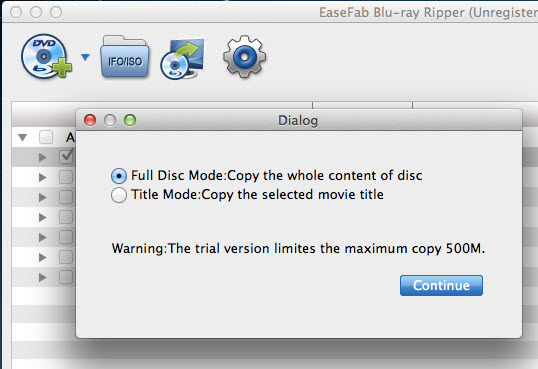
Full Disc Mode: Copy the whole content of disc
Choose Full Disc Mode to start to backup Blu-ray or DVD. In fact, the Full Disc Mode feature maintains the entire structure of an original Blu-ray or DVD disc, so the .vob streams are contained.
Title Mode: Copy the selected movie title
Choose Title Mode. By default, EaseFab Blu-ray Ripper choose the longest title which is usually contains the main movie. And this helps ripping without converting unnecessary titles.
Tip: A title may consist of many chapters. Select Show Chapters from the Edit menu, and then the chapters appear under each title. You can select the chapters which you want to convert.
How to Edit Your Blu-ray or DVD videos on Mac
Before converting your DVD videos, you can click Edit to personalize and touch up your videos in clicks. Video editing functions like trim, crop and adding effect/watermark are provided. Click ![]() to enter the Video Editor Window and then:
to enter the Video Editor Window and then:
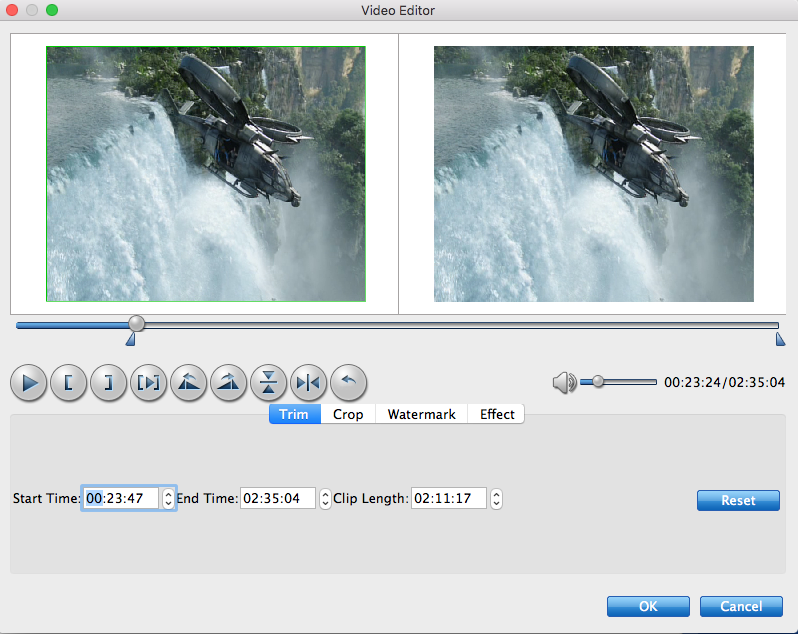
Trim
The "Trim" feature allows users to decide where to start and where to end when converting the selected clip, so that unwanted segments will be cut out after conversion.
To trim a video, please switch to "Trim" tab in "Video Editor" Interface and follow any of the methods below:
1. Drag the control sliders video converter slide to include the segment you want to remain.
2. Click the left square bracket to set start point, and click the right square bracket to set end point when previewing the video.
3. Input specific values to "Start" and "End" box.

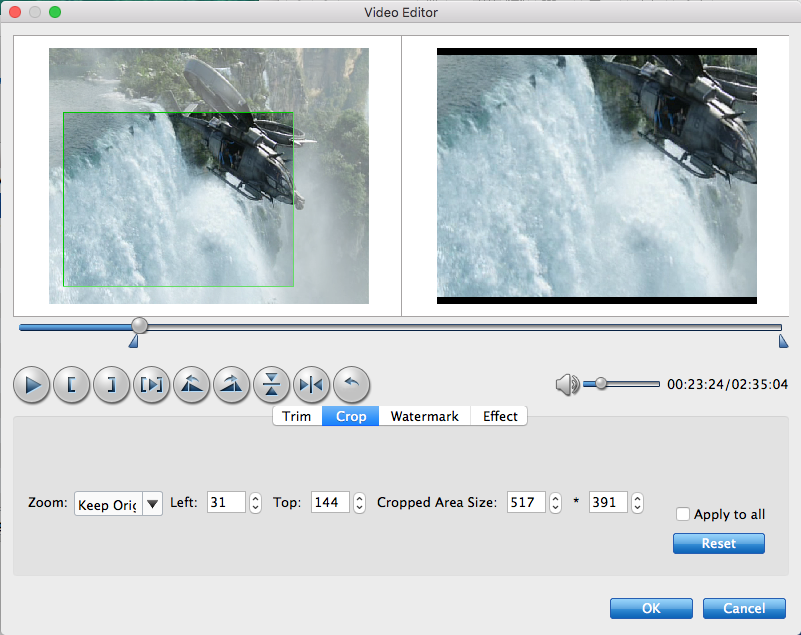
Crop
Here you can drag and move the rectangle on the video to set the crop area or enter the accurate crop values on Left and Top. Meanwhile, you can zoom in or out, change the aspect ratio and rotate videos. In this way, you can remove the black bars of your videos.
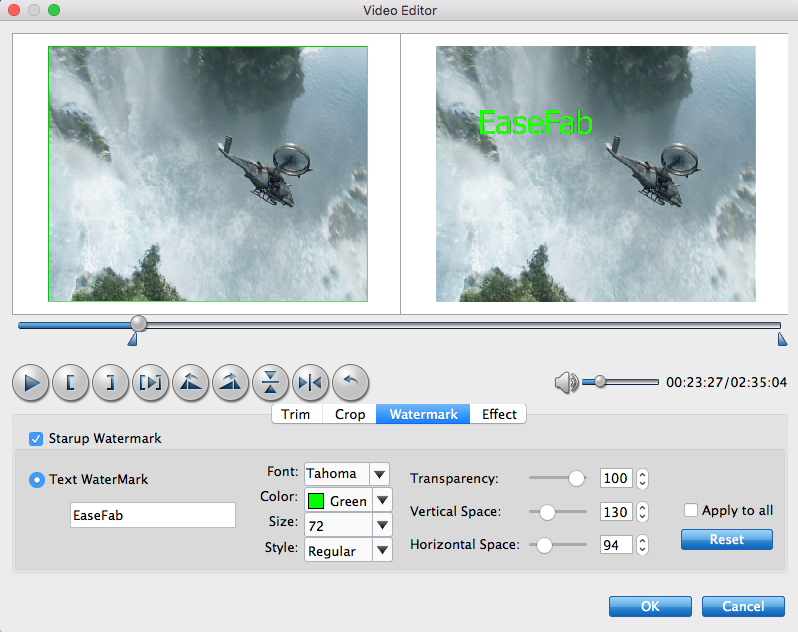
Watermark
Under Watermark tab, you can create a text watermark to personalize your video. Type whatever text you want in the blank input field next to it. You can also adjust the font, transparency, vertical and horizontal position of your watermark.
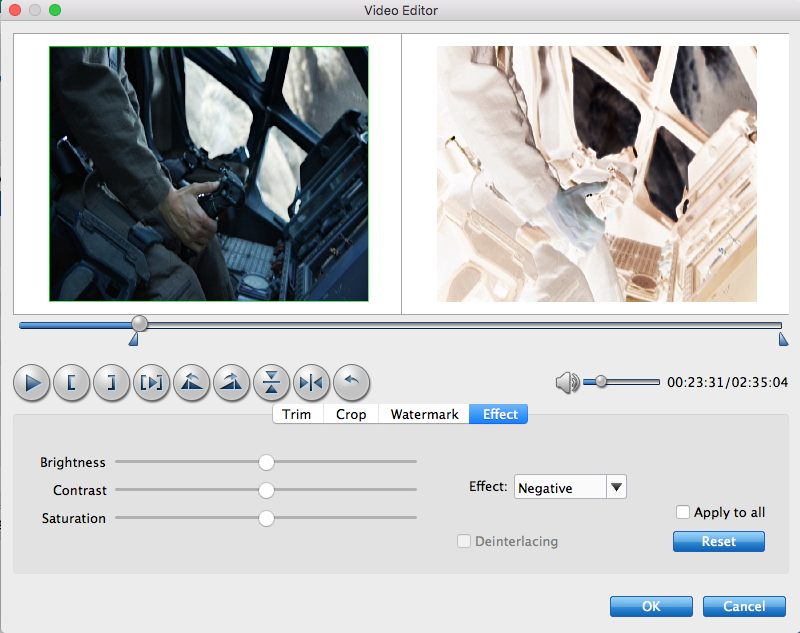
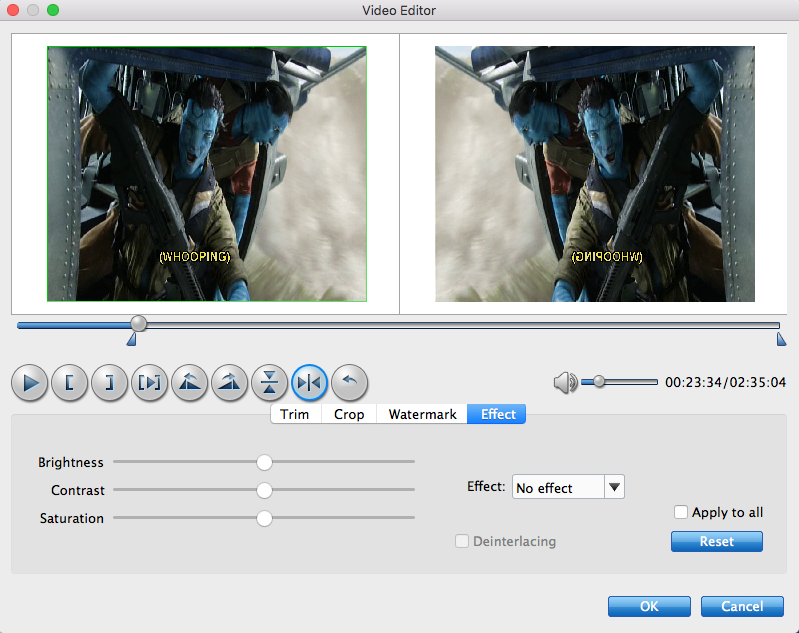
Effect
Click the Effect tab and you'll be able to adjust video brightness, contrast and saturation, apply grey, negative, emboss or old film effects and apply a number of deinterlacing options.
There're clockwise, anticlockwise, flip horizontal and flip vertical 4 options for you to rotate the DVD video.
 Blu-ray Ripper How-tos and Troubleshootings
What are forced subtitles on Blu-ray disc?
How to fix it if program fails to load a DVD? 
What are the limitations of the trial version?
How to load DVD folders, ISO files and IFO files?
How to speed up the conversion with DVD Ripper programs?
How to reduce the size of output file?
What's the difference between D5 and D9 DVDs?
How to register EaseFab softwares (Windows)?
[Comparison]EaseFab DVD Ripper vs Blu-ray Ripper vs LosslessCopy vs Video Converter Ultimate