
AVHCD is the HD standard for full-size consumer camcorders like Canon, Sony, Panasonic, JVC, etc. Right click the AVCHD file, you can find footages are divided into several .mts or m2ts clips for preserving. Final Cut Pro X and FCP 7 makes it easy to work with the latest AVCHD file-based devices, but only several kinds of camcorders like Sony XDCAM HD are involved in the list. So when you are experiencing difficulties with ingesting AVCHD .mts or .m2ts files itno Final Cut Pro, you may obtain an unlisted cam. Besides, the highly-compressed AVCHD content is not so friendly for editing software. Luckily, there is an easy way to get Final Cut Pro working beautifully with MTS/M2TS files. Just follow the guide and go on your movie director experience.
To fix the problem, the easy workaround is to convert MTS/M2TS to Final Cut Pro by using a professional application like EaseFab Video Converter for Mac (compatible with any OS X systems like Yosemite, Mavericks, Mountain Lion, Lion, etc.). The program can easily and quickly rewrap/transcode mts to ProRes .mov, something ensuring maximum editing quality and efficiency when working with FCP. If you have problems when using MTS files in Final Cut Pro X or FCP 7/6 and want to make a smooth editing, just get it and follow the step-by-step tutorial for you to figure out your MTS/M2TS Final Cut Pro problem.
Download the Mac MTS to FCP Converter:
How to Convert MTS/M2TS to Final Cut Pro on Mac OS X
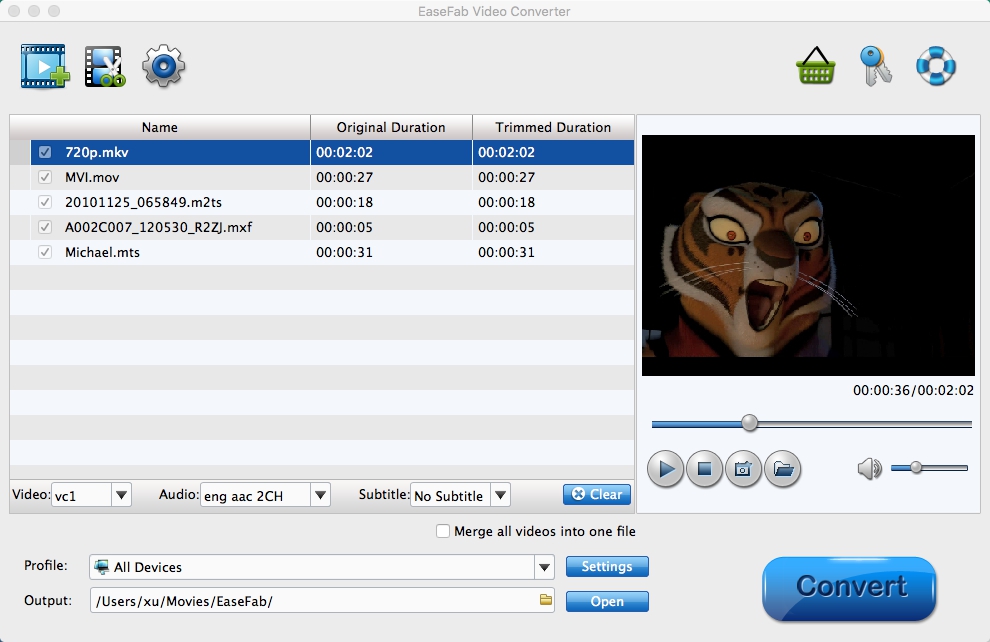
Step 1. Import MTS files to the program
Drag and drop your MTS files from where you stored to the program. Several files can be selected and processed at the same time to save up time. Batch conversion is supported so you can add multiple files to convert at a time.
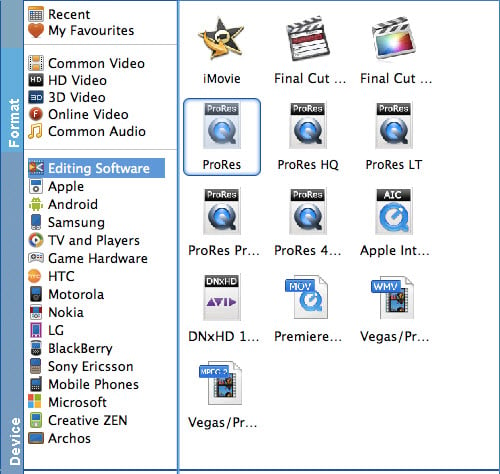
Step 2. Select output format as Final Cut Pro
The Profile tray locates in the buttom of the window. Go to the "Editing Software" category and click "Final Cut Pro" as the output format. By selecting the "Final Cut Pro" preset, you needn't to adjust the video settings like video format, video resolution, frame rate and more by yourself.
Tips: If the default settings do not fit your needs, you can click "Settings" button to adjust audio and video parameters as you like.
Step 3. Start the MTS to FCP conversion process
Click "Convert" button and the selected MTS files will be converted to Apple ProRes encode mov files.
After conversion, click "Open" folder to find converted footage. Finally, Open Final Cut Pro. To import your convert video files, head to the menu bar and click on File > Import, then "Files". A small window will appear and allow you to browse through files in your Mac to locate and import your video. You also have an option to drag-and-drop your file to the left pane of the Final Cut Pro window. Once your video is imported successfully, you can do all you want with it in Final Cut Pro.