Although Adobe claims that Premiere Elements offer native support for QuickTime .MOV format, many users are still puzzled by one thing that some files with MOV file extension can't be imported into Premiere Elements 10/11/12. And there are frequently asked questions quoted below:
"How do add .mov files in Premiere Elements 11 with Windows 8? I get a generic error message."
"I'm working on Windows 8.1 64 bit and use Adobe Premiere Elements 12. I've downloaded and installed on my PC latest version of Apple QuickTime 7.7.4.1680.86...but my Adobe Premiere Elements 12 with installed the latest updates doesn't import these MOV Files with codec PNG Image"
Many folks are facing the MOV importing issues with Premiere Elements, even with the latest Premiere Elements 12. That's possibly because your MOV files, which may be from different sources, such as from some video editing software, or from different cameras, have different codec inside. If your MOV files are not accepted by Adobe Premiere Elements, it's probably because of the video or audio codec incompatibility. On this occasion, you need to transcode MOV to Premiere Elements prferred MPEG-2 or WMV files and then transfer the converted MOV files to Premiere Elements for editing.
The article would show you how to change MOV to Adobe Premiere Elements editing-friendly format step by step with a professional Video Converter from EaseFab, by running it, there's no need to set the codec yourself: the program has optimized presets for Adobe Premiere Elements (Premiere Elements 12 included). You can convert any video file to Adobe Premiere Elements compatible format without loss-less quality in Windows(Windows 8/8.1 included). For Mac user, please get Video Converter for Mac(Yosemite and Mavericks compatible).
Guide: How to convert and import MOV files to Adobe Premiere Elements
Note: This quick start guide takes Video Converter Windows version (Including Windows 8) screenshots as an example. The method to convert MOV to Premiere Elements on Mac is the same. All that you should take care is to download the right version according to your situation.
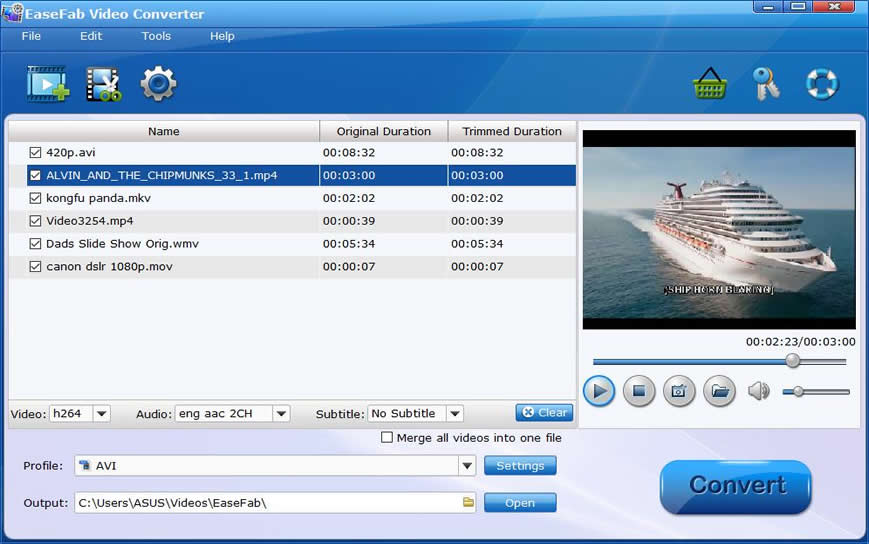
Step 1. Add MOV files
After downloading, install and run the MOV converter for Premiere Elements, and then drag and drop your MOV files to the program. You can also add MKV, VOB, XAVC, XAVC S, MTS video files. Batch conversion is supported so that you can add multiple files to convert at a time.
Step 2. Choose output format
The program has three already optimized the video settings for Adobe Premiere Elements. You can select MOV, WMV or MPEG-2 from "Editing Software" as the output format. All output videos will keep the original quality of .mov video and seamlessly fit Premiere Elements 10/11/12 and more.
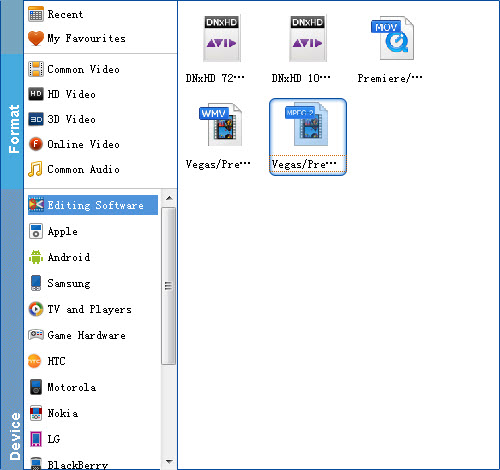
Tip: If the default settings do not fit you requirement, you can click "Settings" icon to and enter "Settings" panel to adjust video size, bit rate, frame rate, sample rate and audio channels.
Step 3. Start the conversion
Finally, hit the big Convert button to start converting MOV files to Premiere Elements supported file formats.
Once the conversion completes, you can click "Open" button to get the output files effortlessly. Now you have got it right, just import the converted MOV files to your Premiere Elements 10, 11, 12 for playback and editing freely.