Lots of people like you are looking for ways to share iMovie to WMV so as to play the video in Windows (Windows 8) smoothly or enjoy them on some WMV-compatible media players. As we all know, diretcly exporting iMovie to WMV is impossible. To do that, you need to first export your iMovie videos by selecting "Export using QuickTime ...">save your videos in MOV or other offered formats, and then convert the iMovie projects to WMV. iMovie videos are usually saved in M4V, MOV, DV and MP4, so if you are about to do the Mac conversion, you'd better install a professional Mac application to be your assistant.
How to Export iMovie to WMV on Mac OS X
This tutorial introduces a solution of converting iMovie video to WMV video on Mac (Yosemite, Mavericks included) by using EaseFab Video Converter for Mac, which can be really helpful by finishing the most of work, quality preserved at the same time, so that you only need click 3 times, simply enough. Besides WMV, you can convert iMovie videos to other video formats, including AVI, MPEG, VOB, MKV, MOV and more. Now just download the trial version below and start the hassle-free iMovie to WMV conversion now.
PS: If you'd like to add WMV files to iMovie for editing, simply follow the tutorial "How to convert WMV to iMovie on Mac" to achieve your goal smoothly.
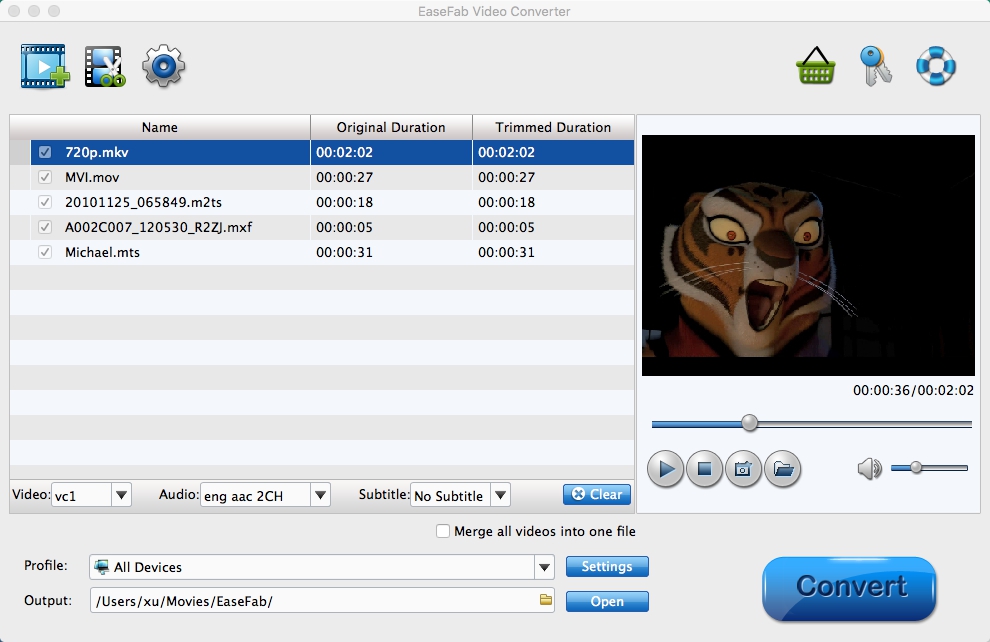
Step 1. Add iMovie files to the Mac app
The Mac program can't directly accept your iMovie project. So please make sure you have saved your iMovie files as MOV video files or other files. Then open the Mac app, and then drag and drop iMovie files to the program. Alternatively, you can click "Add Video" button to locate the iMovie files you want to add. The Mac converter allows you to make batch conversions.
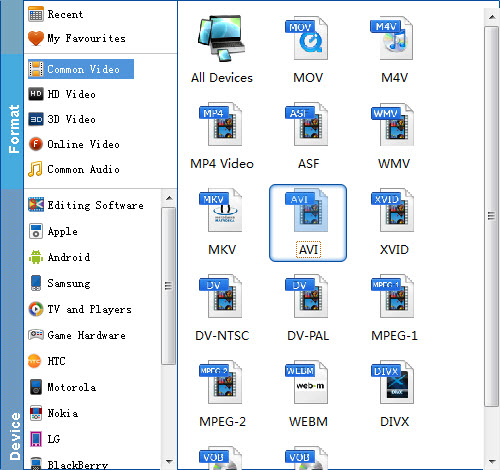
Step 2. Select WMV as the output video format
In the Common Video category of Profile tray, scroll right to choose "WMV" as the output format. As you see, you can also convert iMovie videos to other formats like MKV, AVI, FLV, MPEG, M4V, etc.
Step 3. Start converting the added video to WMV
OK, now you're ready to click the Convert button and wait for the conversion to be done. When the conversion completes, you can get the converted WMV files in the destination folder, which opens automatically after the conversion. After that, you can easily share the videos with your friends who are using Windows or play them on your portable media player.