There are many output options for iMovie that you can put up for consideration when there is a project that you want to export. However, iMovie does not support FLV output. A workaround is to share the exported video to YouTube and then download the video, which would be in FLV format. This method is time consuming and you'll need a YouTube Downloader in order to capture your video from YouTube. Fortunately, there is an alternative easy way to help you share iMovie project to Flash FLV video on Mac. Read on the detailed tutorial about that.
The easy workaround requires a iMovie to Flash video converter. Here EaseFab Video Converter for Mac is highly recommended. It's a well known utility to convert video files to and from any desirable format like MOV, AVI, MP4, MPEG, WMV, etc. Most important is that the video quality will be kept while transforming to another format. Before the iMovie to Flash FLV task, you need first export video using QuickTime MOV or M4V from iMovie and then convert to FLV format. Below is the step-by-step guide to utilise this remarkable utility and export your iMovie to FLV format.
PS: If you have some FLV videos and want to edit them in iMovie, you can also use this app to convert FLV to iMovie native editing format without loss-less quality.
Exporting iMovie to FLV on Mac OS X(macOS Mojave)
As mentioned above, first you need to export your finished movie from iMovie to Mac, either through Share > Export Movie or simply pressing Command+E to open a dialog and export your movie to computer. The movie will be saved into M4V or MOV depending on your selected option. Now let's begin the iMovie to FLV conversion process.
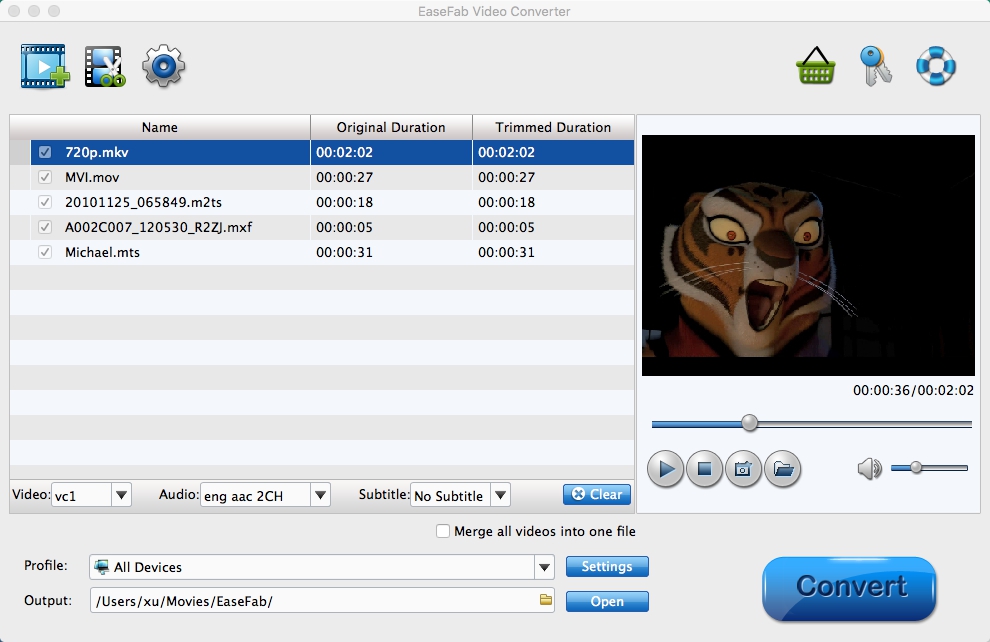
Step 1: Import iMovie video to FLV Mac converter
To add your iMovie videos to the FLV Mac video converter, you have two options: directly drag and drop the iMovie output video to the program, or head to choose Add Video button.
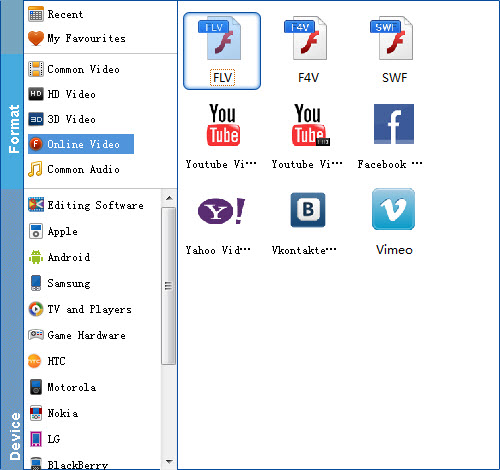
Step 2: Select "FLV" as output format
Click "Profile" icon and you can see the format dropdown list. Choose "FLV" from "Online Video" category. Then click "Output" drop down list to select a proper destination folder for output files if you want to change the current default output folder. If necessary, you can click "Settings" to adjust video encoders, bit rate, frame rate, etc.
Step 3. Start iMovie to FLV conversion
Click the "Convert" button to start conversion, when the conversion is done, you can upload the FLV video to your website. The video size of the output Flash Video will be way smaller than iMovie M4V video. Give this powerfull yet easy to use iMovie to FLV Video Converter for Mac (Yosemite and Mavericks included) a try!