
The current version of the Windows Movie Maker provided in the Microsoft Essential (Suite) 2012 offers a wider range of supported file formats compared to it's previous versions meant for Windows Vista or XP. Still, an exclamation mark appears when you try to open a FLV file in Windows Movie Maker. FLV usually comes from a video-sharing website like YouTube, Vimeo or from OBS (Open Broadcaster Software), etc. The reason that Windows Movie Maker can't read FLV is easy: FLV is not supported by Windows Movie Maker. Fortunately, there are always solutions out there. This article will introduce 2 easy ways to import FLV videos to Windows Movie Maker for smooth editing.
Solution One: Installing K-Lite Codec Pack Basic
Installing a smaller codec pack resolves the problem, no video conversion is needed anymore.
Codec pack used: K-Lite Basic,
Download Codec pack: Server 1.
Note: Codecs are only part of the video editing puzzle, system resources, video card, DirectX and system patches. Ensure you are checking these items too and updating regularly. If K-Lite Codec does not work, you can try the solution two, which guarantees to editing FLV videos in Windows Movie Maker without any problems.
Solution Two: Convert FLV to Windows Movie Maker Compatible File Format
Software used: EaseFab Video Converter
Download the software:
About the software:
EaseFab Video Converter is an easy-to-use yet powerful video conversion tool for Windows (Windows 8/8.1 included) users. It supports creating high quality WMV video for your Windows Movie Maker, no matter what's the format of your source video files. It can convert almost any video to WMV so you can import your video to Windows Movie Maker for editing.
The guide below will teach you how to convert FLV to WMV so that you can edit FLV videos in Windows Movie Maker without problems.
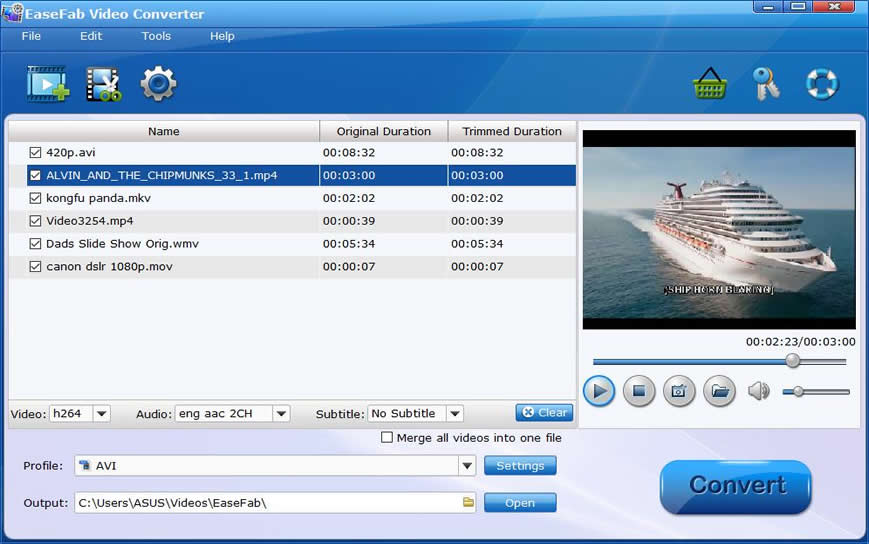
Step 1. Add FLV video files
After downloading, install and launch the app, then drag and drop your source FLV videos to the program. You can also click Add Video button to locate your video files to import. You can add multiple files for conversion at one to save time.
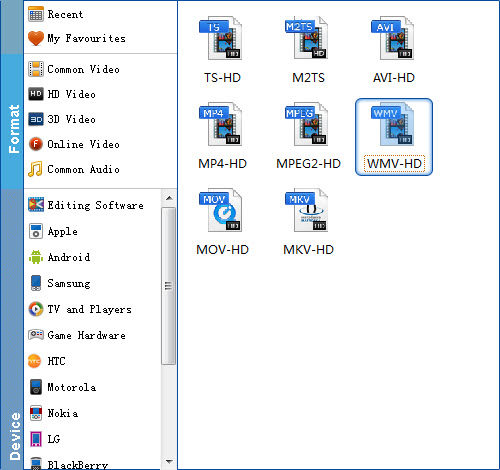
Step 2. Set WMV as the output format
Hit the "Profile" box and select "HD Video" > "WMV HD" on the dropdown menu as output format. Besides, you can also choose AVI HD as output if you have not installed the .wmv codec. If you want to make changes to the video settings like resolution, bit rate and other settings, click the Settings button besides Profile.
Step 3. Convert FLV to Windows Movie Maker compatible WMV format
When everything is ready, click the Convert button and all the imported FLV video files will be converted to WMV format by this FLV to Windows Movie Maker Video Converter.
hen the conversion complete, open Windows Movie Maker and click Import or Import Video on the left to import your video to the movie collection and drag and drop to the timeline for editing.