
When working on PPT for use on a demonstration or class, the Office PowerPoint provides us a "Insert" function to add picture, music and video into PowerPoint slide. Many people like to add short videos to make the PPT more attractive. There are some occasions that you need to put part of a DVD into a PowerPoint Presentation. However, PowerPoint doesn't support DVD format. How can we do this? If you're looking for ways to add part of DVD to PowerPoint for playing, just read on for details.
| MP4 to PowerPoint | QuickTime MOV to PowerPoint | FLV to PowerPoint | MKV to PowerPoint |
To finish the task, you can convert DVD to PowerPoint supported video formats first and then insert the converted videos to your presentation. The best format that all PowerPoint versions (including PowerPoint PPT 2016, 2010, 2003, 2007 or lower version) can support are AVI and WMV as well ASF, MPEG, which are created by Microsoft itself. So what you need is just a DVD ripping program that can convert DVD movies to AVI, ASF, WMV, MPEG, etc. EaseFab DVD Ripper is bee's knees, which can help you fast rip DVD discs to a format compatible by PowerPoint while keeping the excellent output quality.
The program lets you rip DVD to all popular video formats and even extract audio from DVD movies. Besides, the built-in video editor allows you to trim, crop, rotate video, add watermarks, etc. to get the very part and effect you want. If you want to insert files from DVD to PowerPoint on Mac, try the equivalent Mac version - EaseFab DVD Ripper for Mac. Just get the right version and follow the guide below to convert DVD to PowerPoint supported video formats and insert videos to PowerPoint presentation.
How to convert and insert DVD to PowerPoint presentation
The below guide takes DVD Ripper for Windows (Windows 10 compatible) screenshots for example. The way to convert DVD to PowerPoint presentation on Mac (El Capitan included) is the same. Just make sure you get the right version.
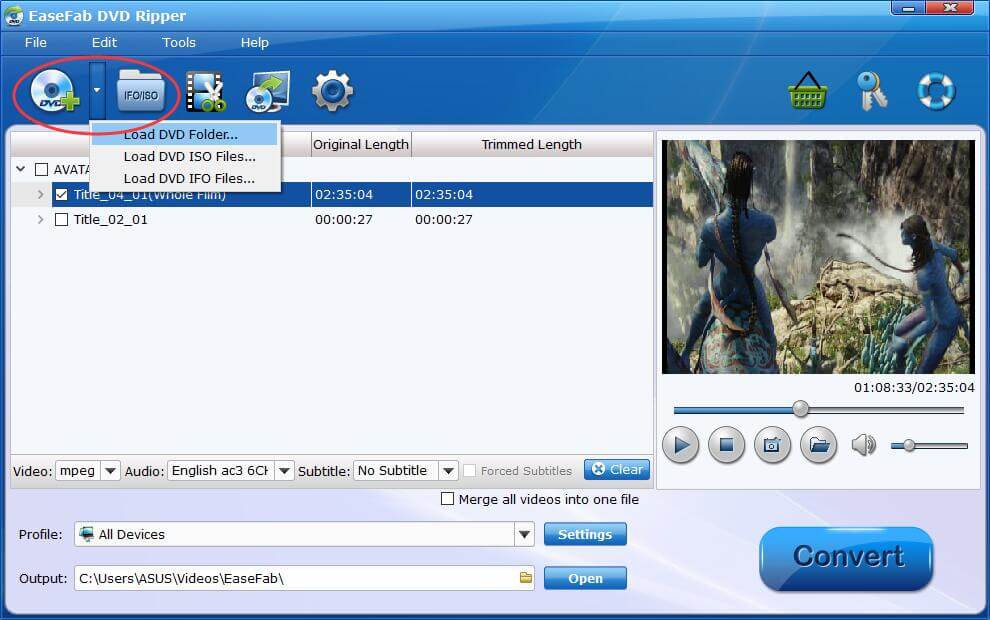
Step 1. Load DVD files
Insert the DVD disc into the DVD drive, open the program and import the DVD files. You can select the subtitle language as you want.
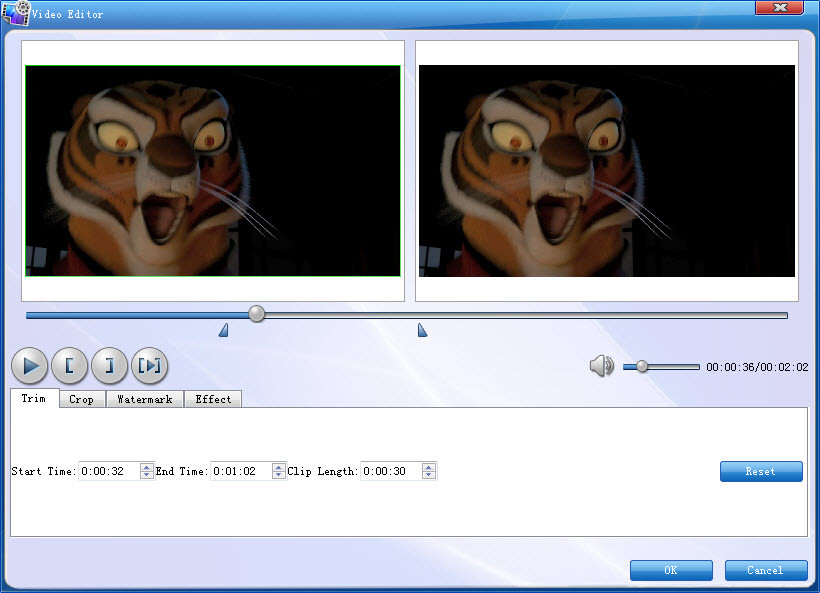
Step 2. Edit your movie (Optional)
Click  to enter the Video Editor Window. As you see, you can trim, crop or adjust the video with the built-in video editor to get the very part and effect of the movie you want.
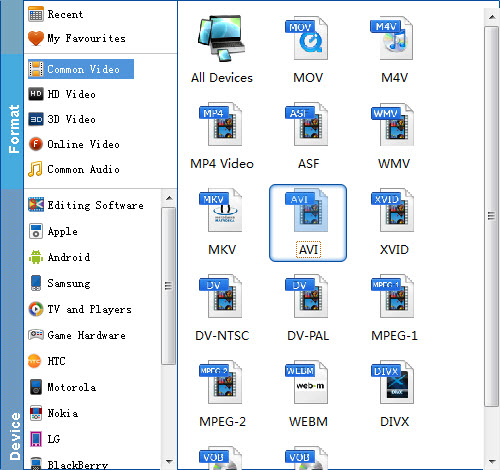
Step 3. Choose the export format
Click the drop-down button beside "Profile" on the interface to select PowerPoint compatible video formats from "Common Video" category. For Windows user, please choose WMV or AVI as the output formats; for Mac user, please select MOV or MP4 Video as the output formats.
Step 4. Start conversion
Click "Convert" to begin the ripping with the DVD to PowerPoint Converter. After the conversion, you will get the desired videos in the destination folder.
Step 5. Embed converted DVD video in PowerPoint
Before starting adding video to PowerPoint, you need to create a folder and put both your converted video and your PowerPoint presentation in this folder. Then open the PowerPoint in this folder to insert the converted video file which is just located in this folder.
For PowerPoint 2007 and higher, select Insert tab from ribbon, and click Movie and select the converted file to insert into PowerPoint for playback.
For PowerPoint 2003 and lower, from menu, select Insert -> Movies and Sounds -> Movie from File..., and select the converted file to insert into PowerPoint.